Setting Up an Advocate Reward
Updated
by Samantha Brown
An enticing Advocate Reward is one of the best ways to get your current customers to start becoming your faithful brand advocates. Get started with growing your business through referrals by learning how to set up an Advocate Reward in this help article!
Step 1
Navigate to Referral and then select Edit for an existing Campaign or create a new Campaign.
Step 2
Select the Advocate Reward tab from the top menu bar in the Campaign.

Step 3
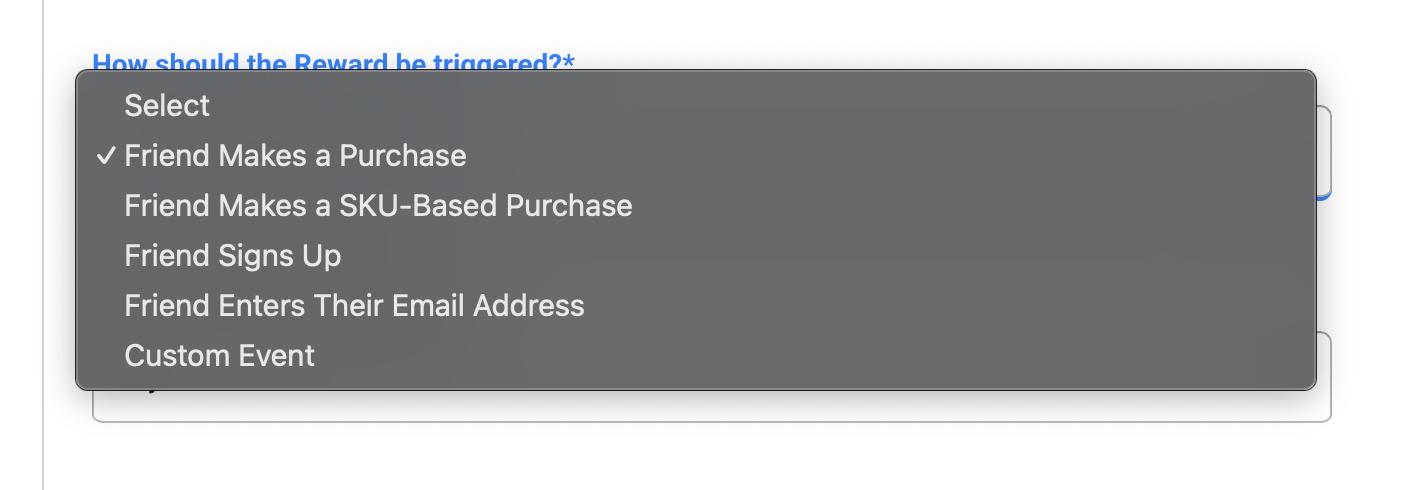
Select how your reward should be triggered from the following options:
Step 4
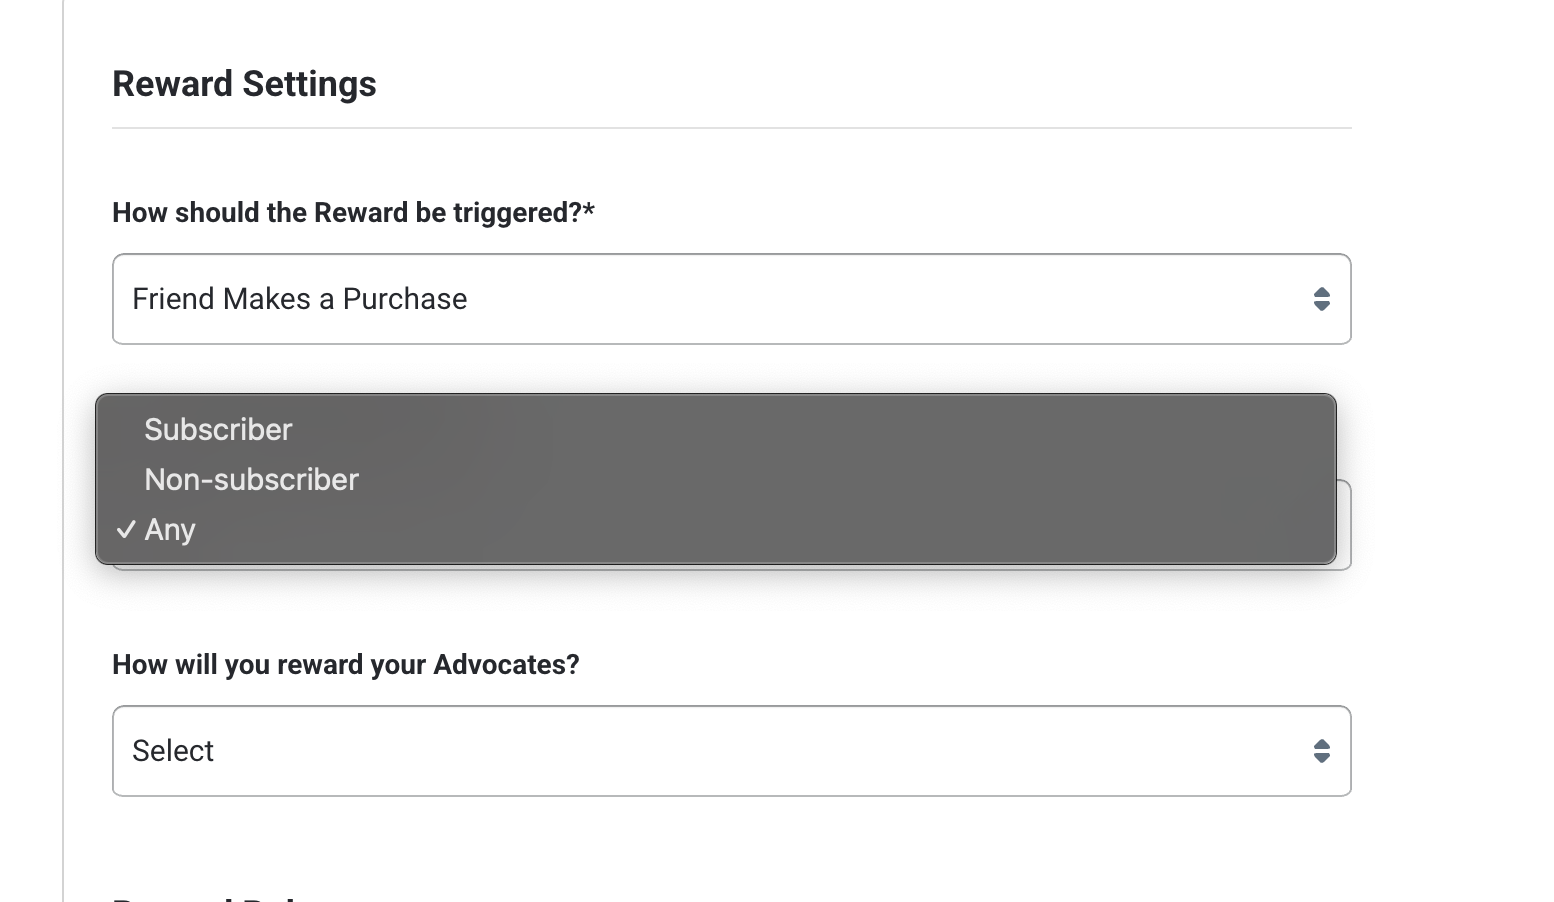
Then, You can select the Advocate Subscription Status to determine how you want to reward subscribers vs. non-subscribers
Step 6:
Within the Reward Settings section, you will determine how the Advocate will be rewarded and when to trigger the Reward distribution.

Within the How will you reward your Advocates? dropdown menu, select one of the following options to distribute a Reward when all the conditions are met:
Coupon Code | If you're using an eCommerce platform outside of Shopify and would like to distribute Advocate Rewards as coupon codes, you would select this option. The coupon codes will be distributed from a code bank of your choice within Friendbuy. Read our help article about how to create a code bank. |
Stripe Credit | The credit will be auto-applied to the subscriber's next renewal |
Stripe 'Next Renewal Free' | The subscription will be free up to a maximum amount set it Friendbuy |
Stripe Free Product | Subscribers will receive a free product on their next upcoming subscription. The product must have an active one-time pricing in the same currency as the subscription. |
Ordergroove Discount | The discount will be auto-applied to the subscriber's next renewal |
Recharge Discount | The discount will be auto-applied to the subscriber's next renewal |
Account Credit | When on Shopify Plus and utilizing our integration with Shopify, you would be able to issue Account Credit to your Advocates with additional implementation steps required. Please contact Support or your Customer Success Manager for assistance. |
Gift Card | Gift cards can be distributed to an Advocate from a code bank of your choice within Friendbuy. |
Tremendous Gift Cards | Automatically distribute gift cards, prepaid cards, or cash through our seamless integration with Tremendous (This option is only available for merchants that have a Tremendous account and have set up the integration within Friendbuy). |
Shopify Coupons | The coupon code will automatically be generated via our Shopify integration and distributed to the customer when the referral conversion event is completed. Optionally, you can add a minimum purchase amount and new customer eligibility restrictions for redeeming the coupon at your Shopify store. Each coupon will be unique, one time use, good for all products, and does not expire. (This option is only available for merchants that have a Shopify account and have set up the integration within Friendbuy). |
Other | If you are setting up a custom flow where the Advocate Reward distribution is handled by your team, select this option. For example, if you would like to provide a promotional swag item or manage account credit independently in your own system. |


Step 4
Then select the event you would like to trigger the Advocate Reward for distribution.

Friend Makes a Purchase | Select this trigger to reward an Advocate when a referred Friend goes on to make a purchase. Note: Friendbuy automatically tracks purchase events by default |
Friend Signs Up | Select this trigger to reward an Advocate when a referred Friend signs up for your service. Note: You must send the event type sign_up in a track call (either through JavaScript or API) to Friendbuy. |
Friend Enters Their Email Address | Select this trigger to reward an Advocate when a referred Friend enters their email within a Friendbuy powered widget. Note: Friendbuy automatically tracks email_capture events by default. |
Custom Event | Select this trigger if you would like to track a custom event and send it to Friendbuy. You must specify the Custom Event Name. Please read the important note below. |

Step 5
The next part of the setup will be for Reward Rules, which determine the requirements that are needed to be met in order for the Advocate Reward to be distributed. The one item to set up is the following question:

Step 6 (Optional)
Within the Reward Validation section, you can set up an additional check to validate conversion event details are accurate before a Reward is distributed. Friendbuy can automate this process by making a call to your system using our Validation Callback which allows you to run custom checks in your own system before a Reward is distributed. Enable this using the Custom Reward Validation toggle and enter a URL endpoint. This feature can be especially useful when you may want to reject an Advocate's Reward based on custom critiera, such as checking for a Referred Friend returning or canceling an order.

This validation check can be turned off for Shopify merchants that are using an alternate checkout method, like CartHook, by selecting No within the setting: Would you like Friendbuy to validate referred Friend Purchases with Shopify?*
Step 7 (Optional)
Within the Reward Validation section, you can set up a Reward Delay which adds a time delay between when the conversion event occurs and the Advocate Reward is distributed. Enable this using the toggle and enter a period of time in minutes, hours, or days. This feature can be especially useful when you want to have time to manually review Advocate Rewards details before they are distributed or if you have set up Custom Reward Validation in Step 6, waiting until after a product return or cancellation period ends.

Step 8 (Optional)
The final section of the Advocate Reward setup is the 'Reward Allowance'! This will control the maximum amount of Rewards an Advocate can receive and will allow you to set up different tiers of Rewards as well.
If you'd like to set up a Standard Reward Structure:
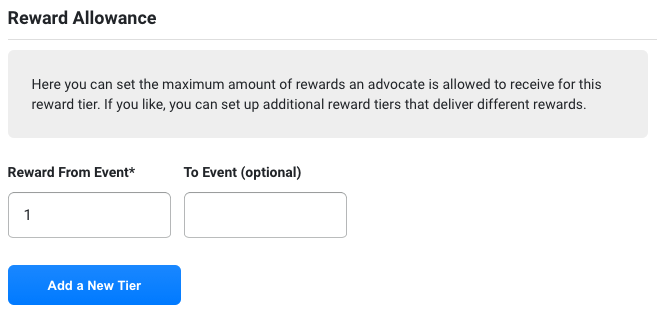
If you'd like to set up a standard Reward structure where there is no limit to the number of Rewards the Advocate can receive, you can leave the settings as shown in the screenshot above.
If you'd like to set up Tiered Rewards:
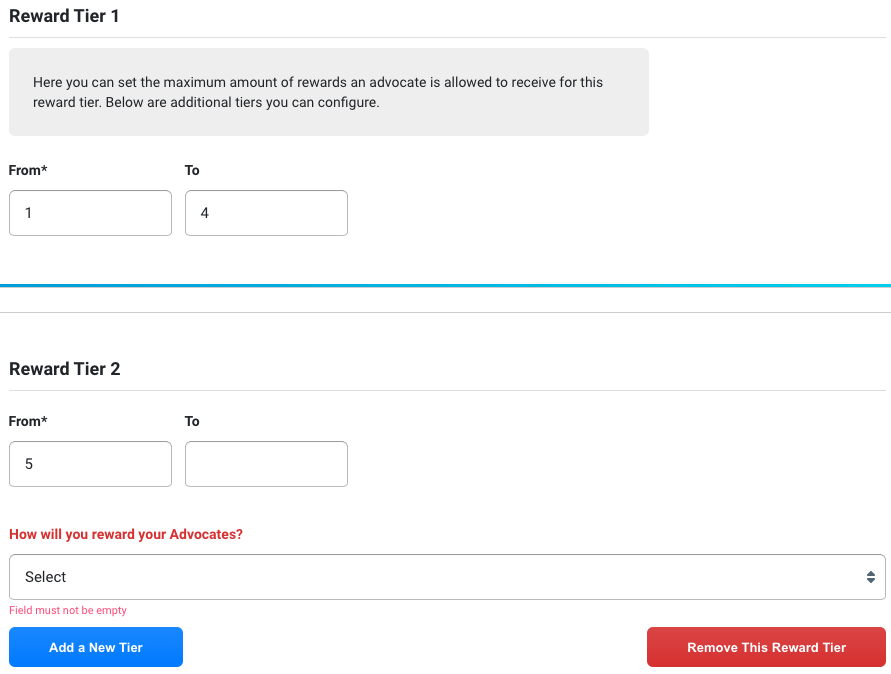
Tiered Rewards allow the Advocate to receive a different reward based on how many Referred Conversions they've generated. For each additional Tier, enter the starting number of conversions in the From field and an ending number in the To field (optional). Then, select the reward type you would like your Advocates to earn and the email used to distribute the reward.
Click Add a New Tier when you're ready to add an additional Tier.
Step 9
After you have completed all necessary steps, be sure to double-check each input is correct. Then, click to Save (if your campaign is not yet running) or Publish Changes (if your campaign is running) in the top right corner of your screen.
