Influencer Applications

Overview
Influencer Applications gives you a branded form where creators can apply to join your influencer program. You review each application in Friendbuy, and when you approve someone, they're added to the campaigns you pick and receive each campaign's invitation email.
Use it to:
- Turn inbound interest from your site, emails, and social bios into a reviewable pipeline
- Collect the details you need to vet creators, with up to 10 questions of your own
- Keep a record of the program terms every applicant accepted, and when
- Approve creators into one or more campaigns in a single step
You'll find it under Influencers > Applications. Your program has one application form, and you decide which campaigns to add each creator to when you approve them.
How it works
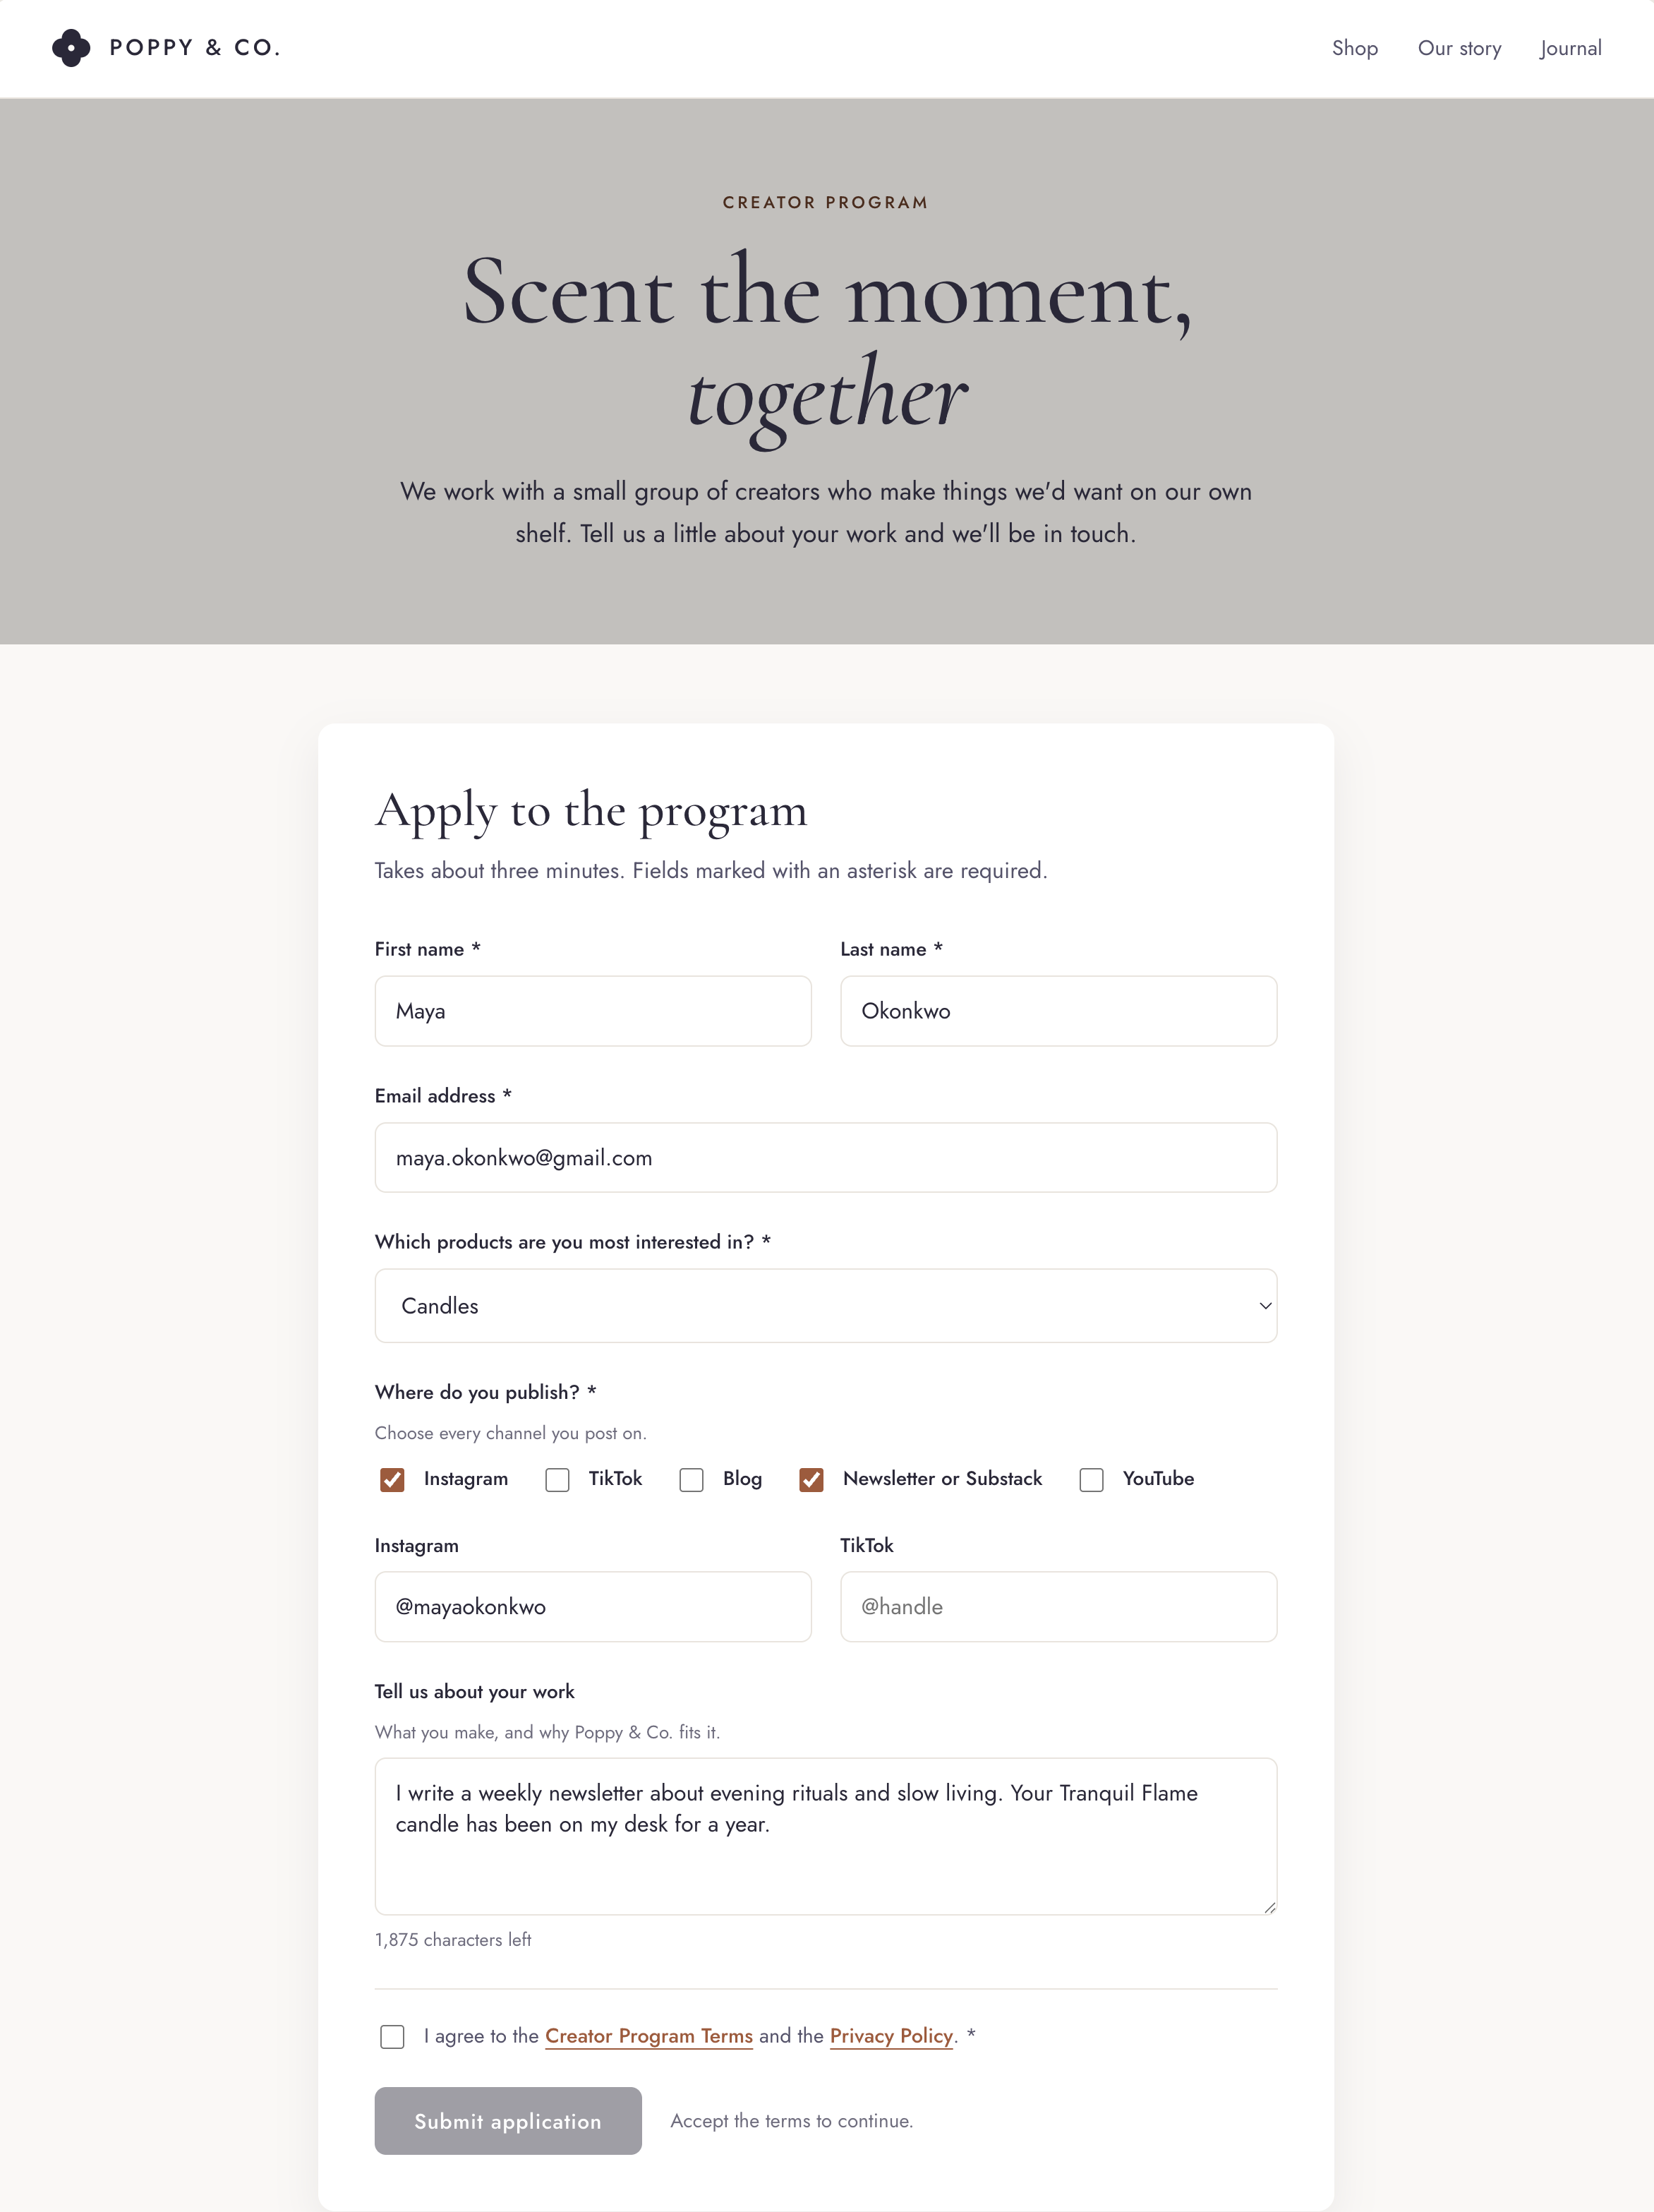
- A creator applies on your application page.
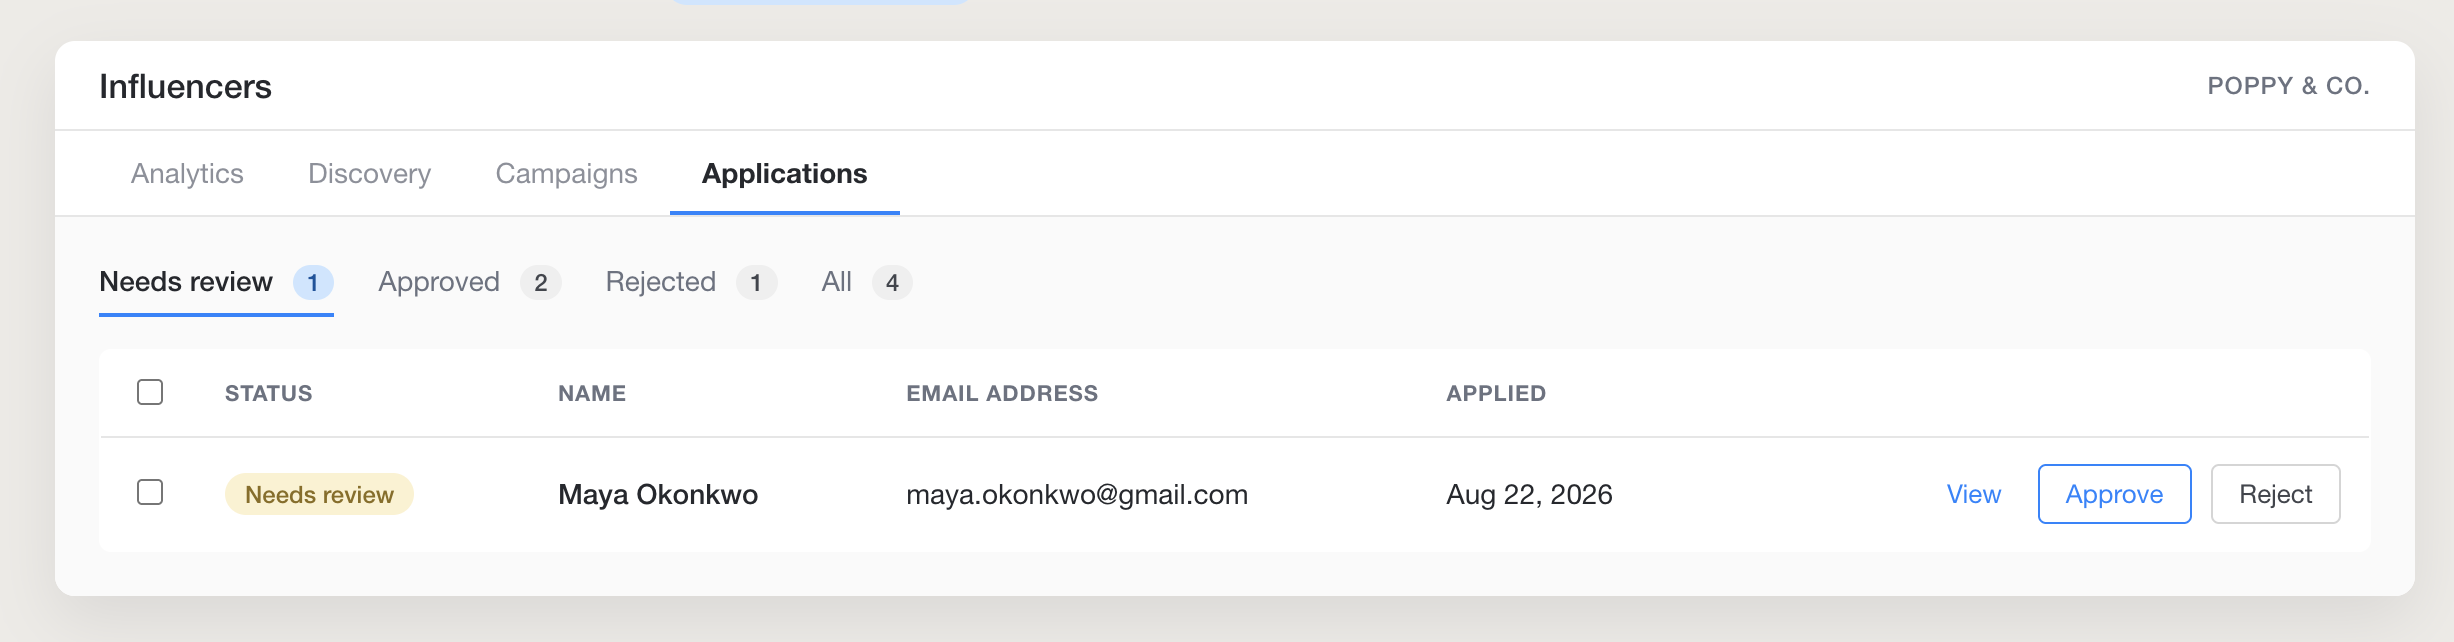
- You review the application. If you approve it, the creator moves forward. If you reject it, the application moves to the Rejected tab and nothing is sent to the creator.
- The approved creator receives an invitation email for each campaign you picked
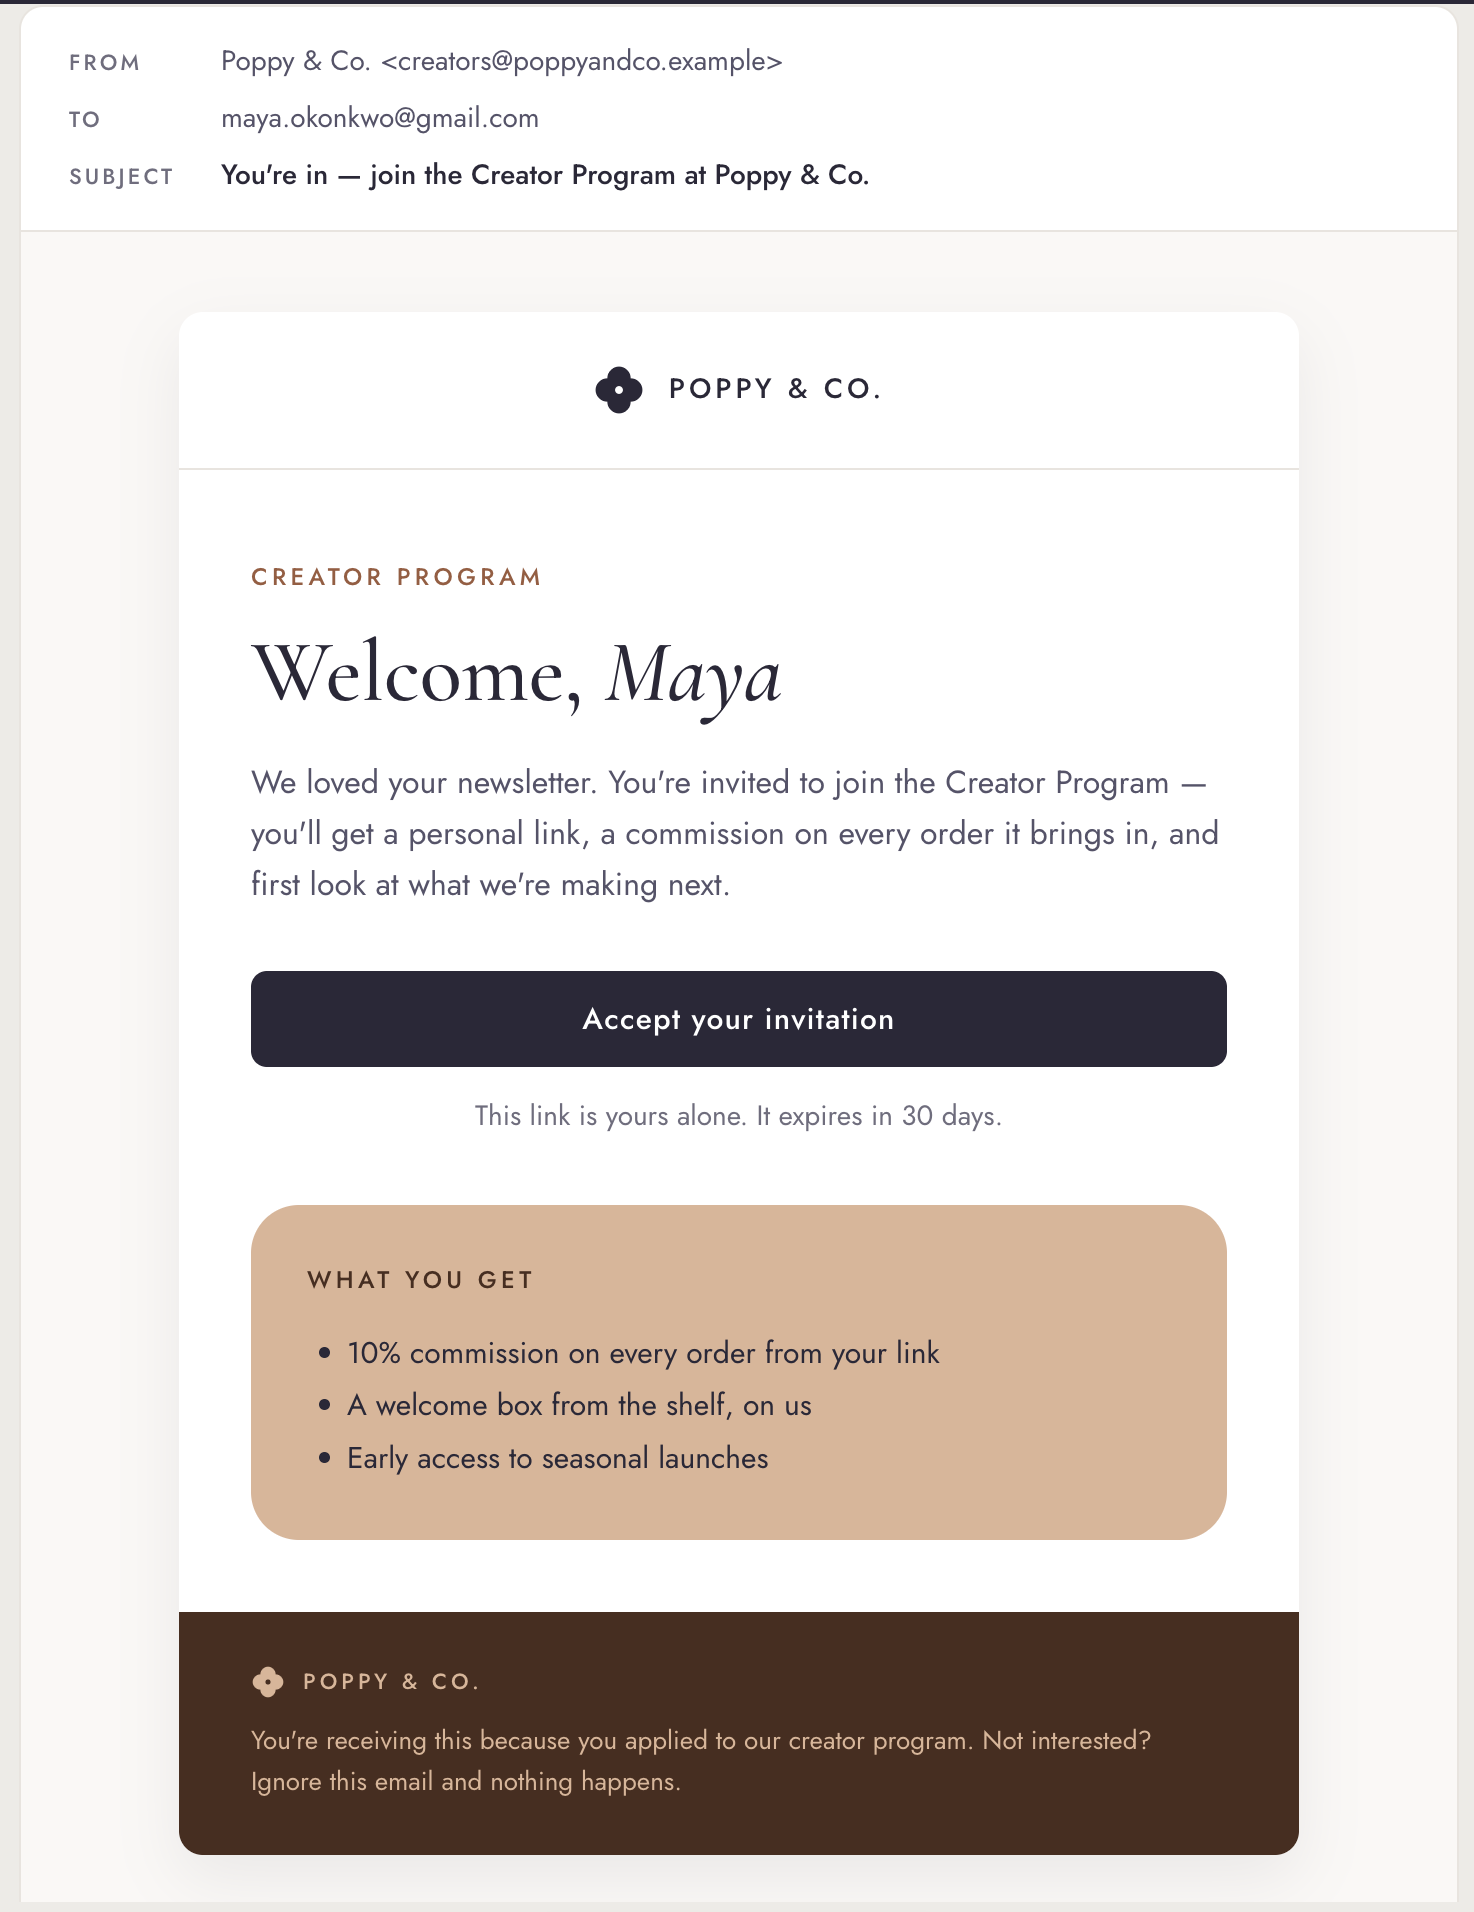
- The email CTA takes them to the invitation landing page.
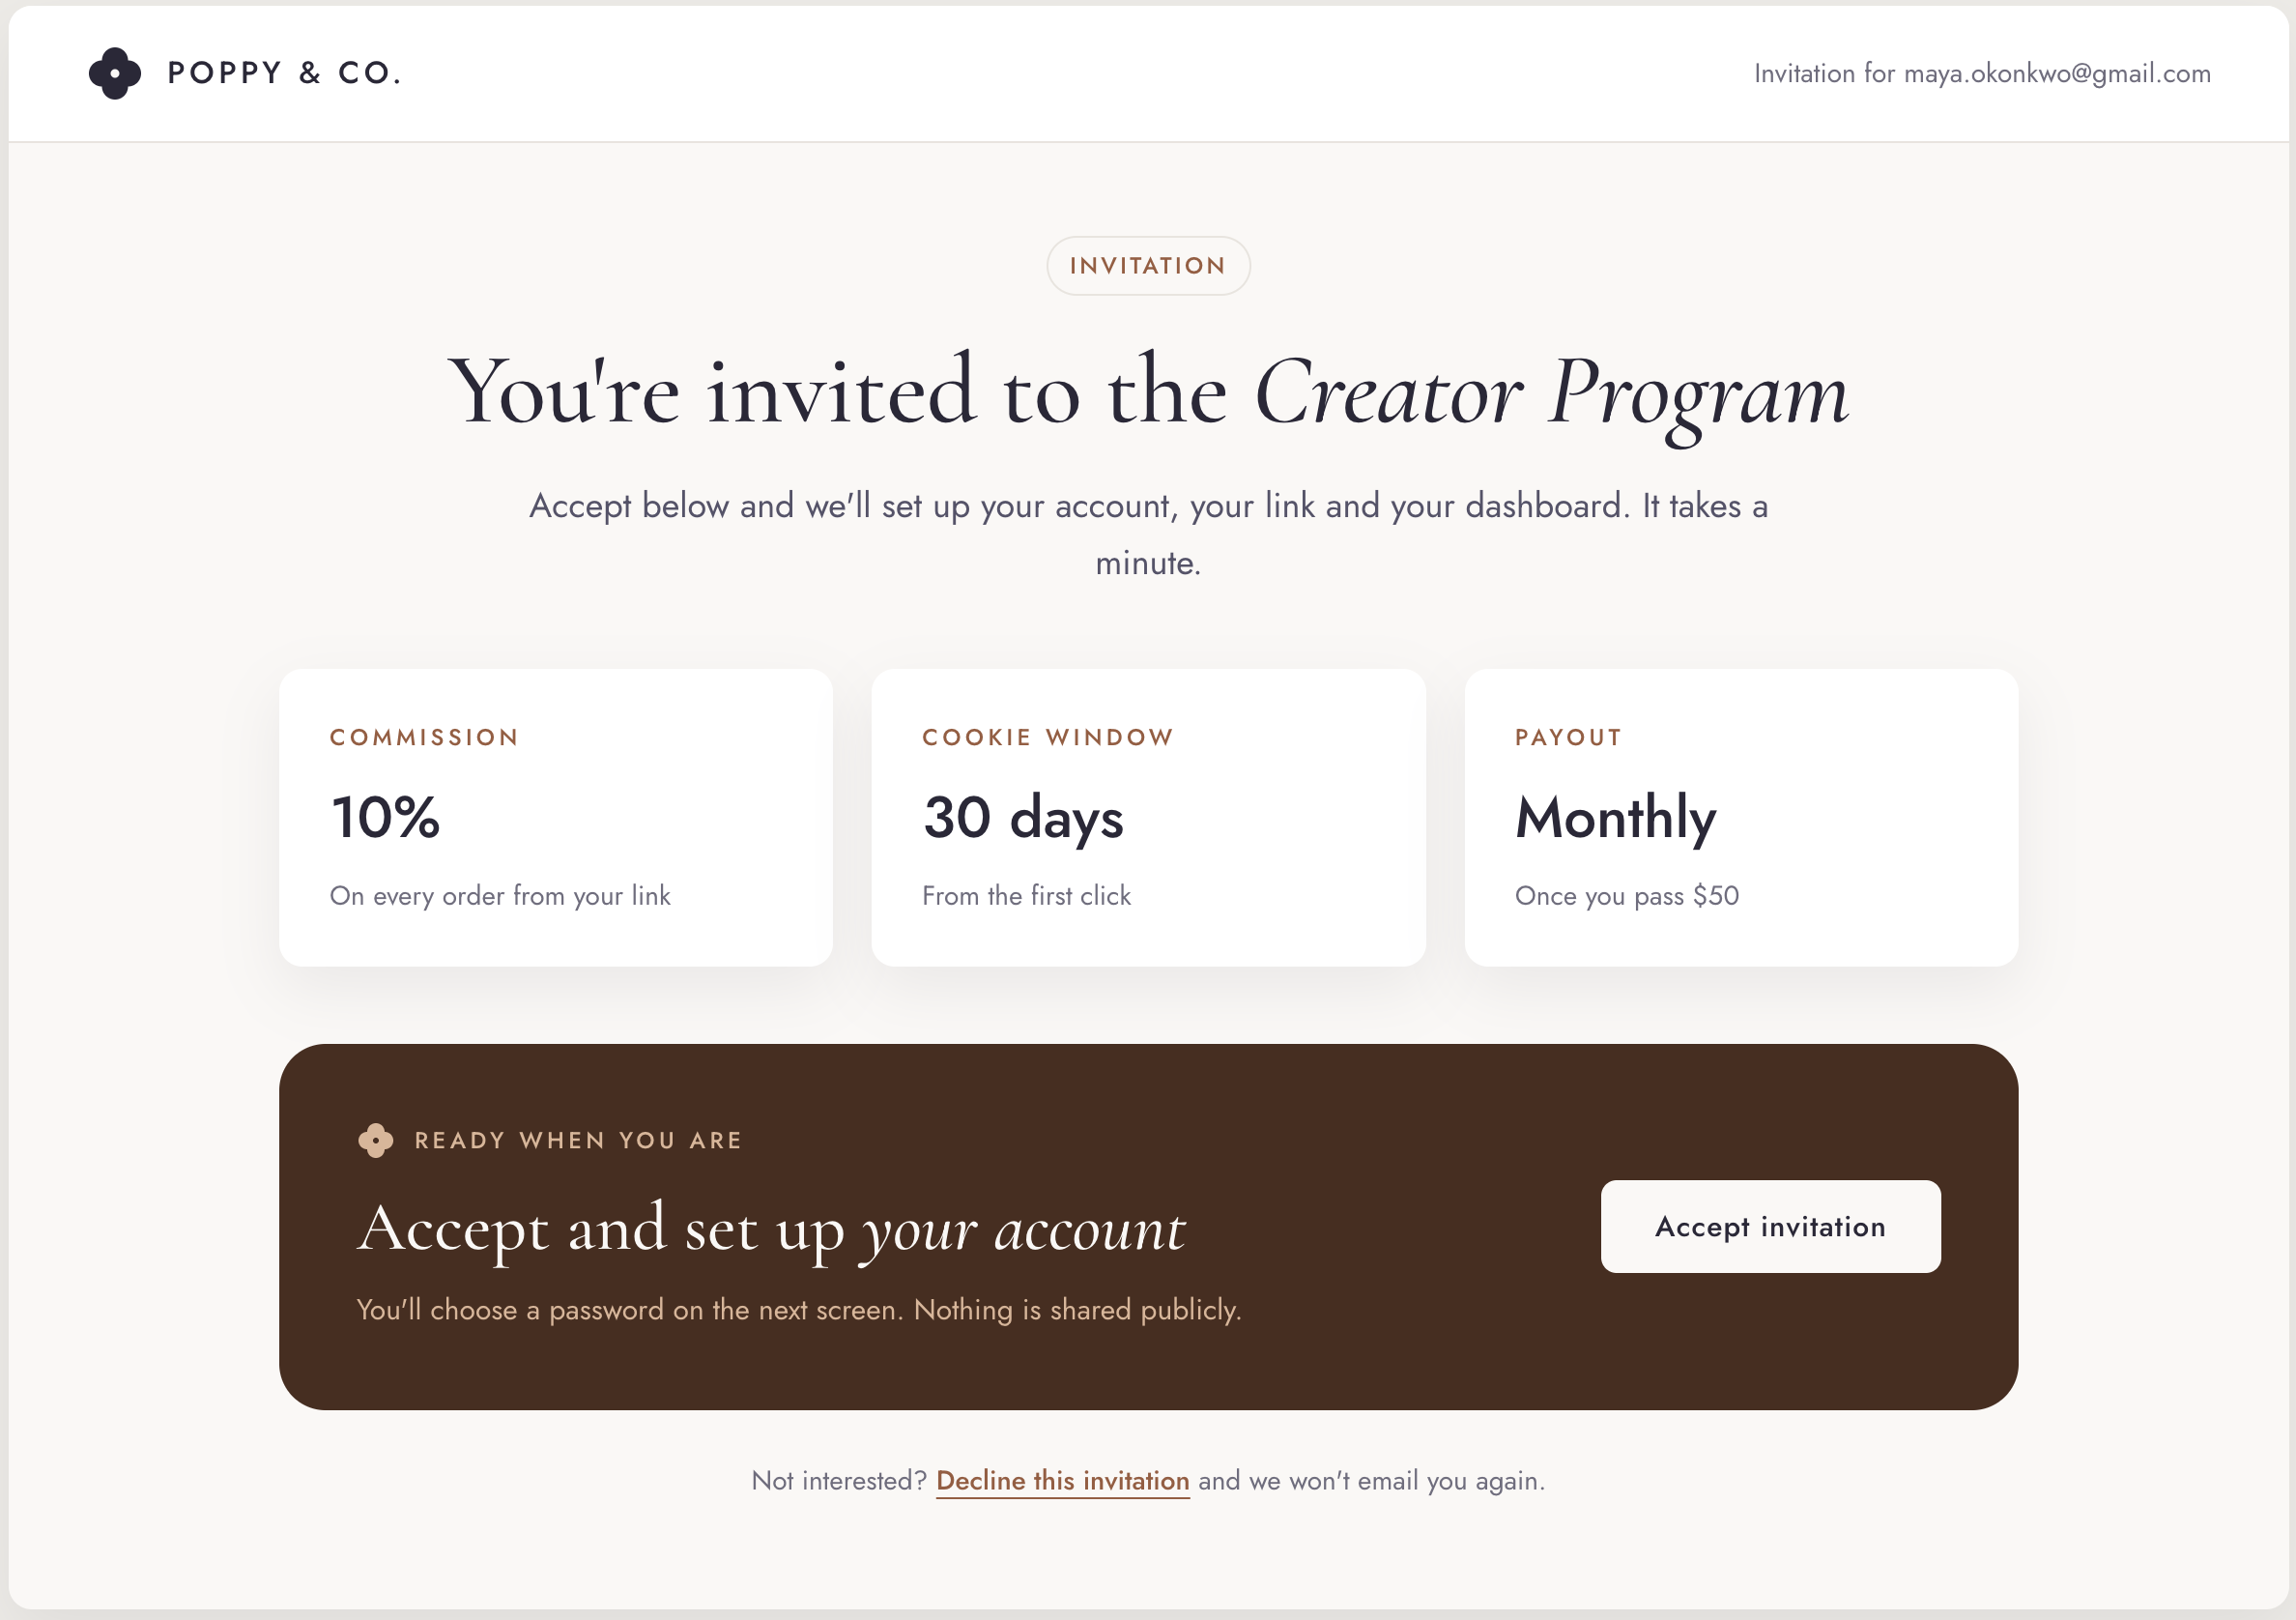
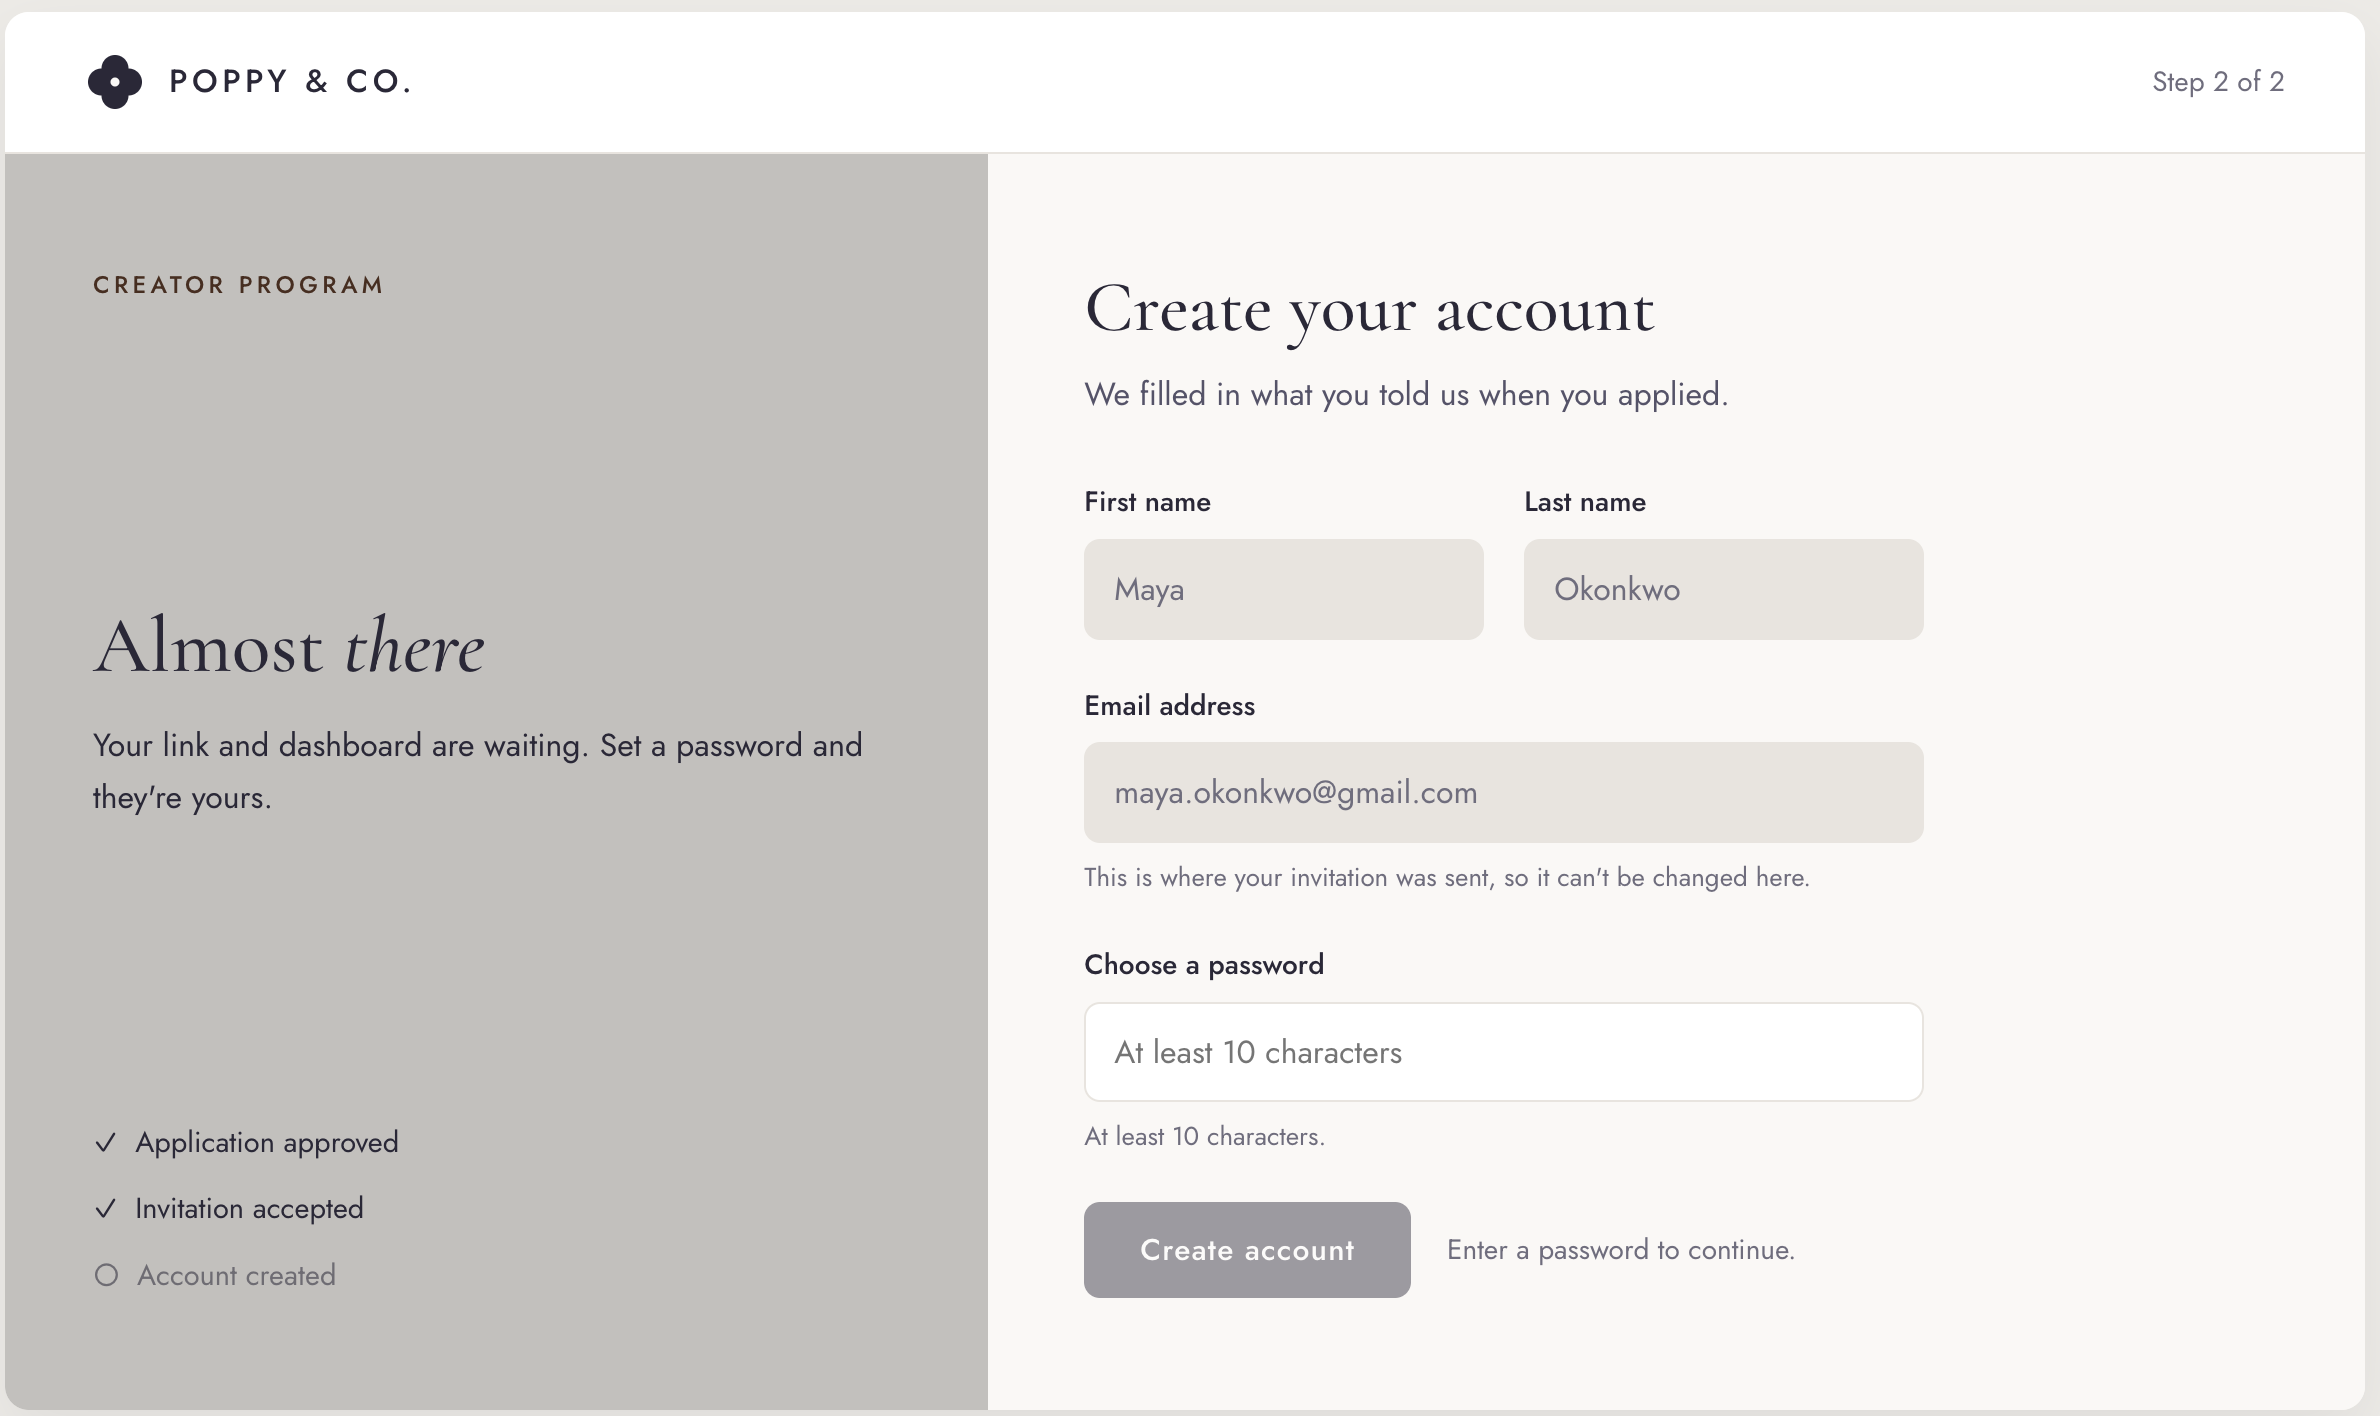
- The creator accepts the invitation and registers for the creator program
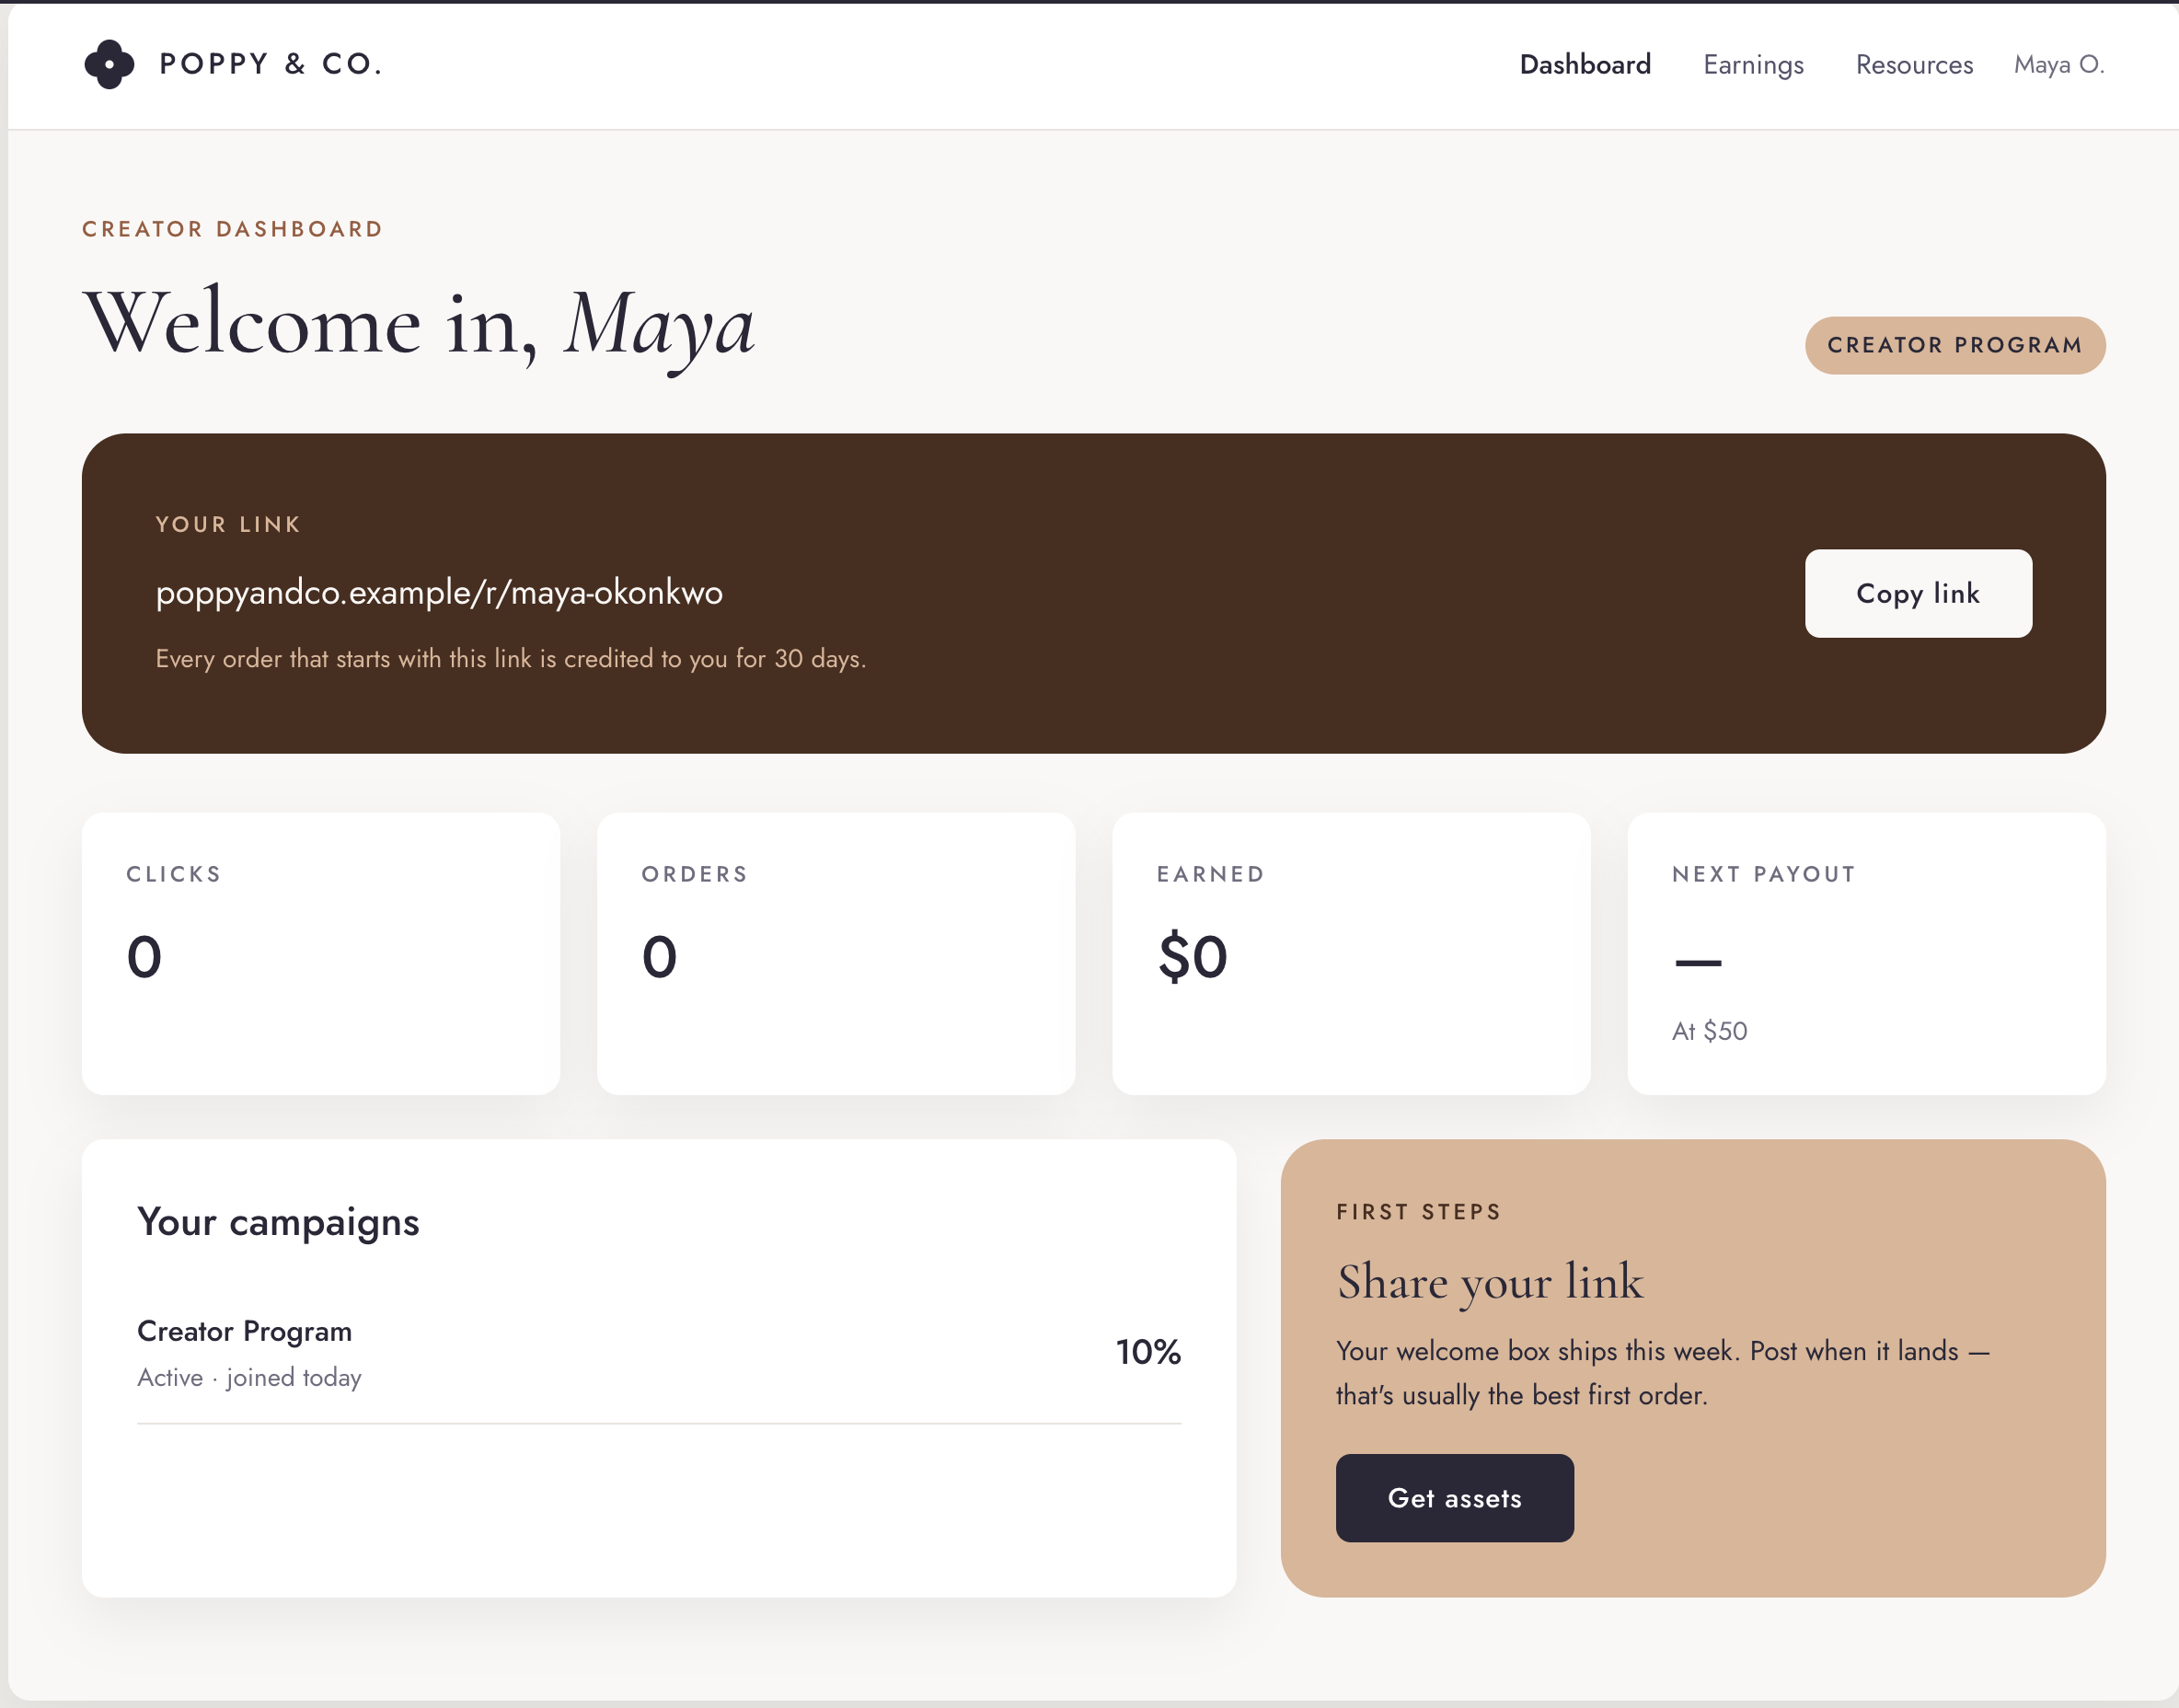
- The creator is taken to their dashboard where they can access their shareable link and payout information.
Set up your application page
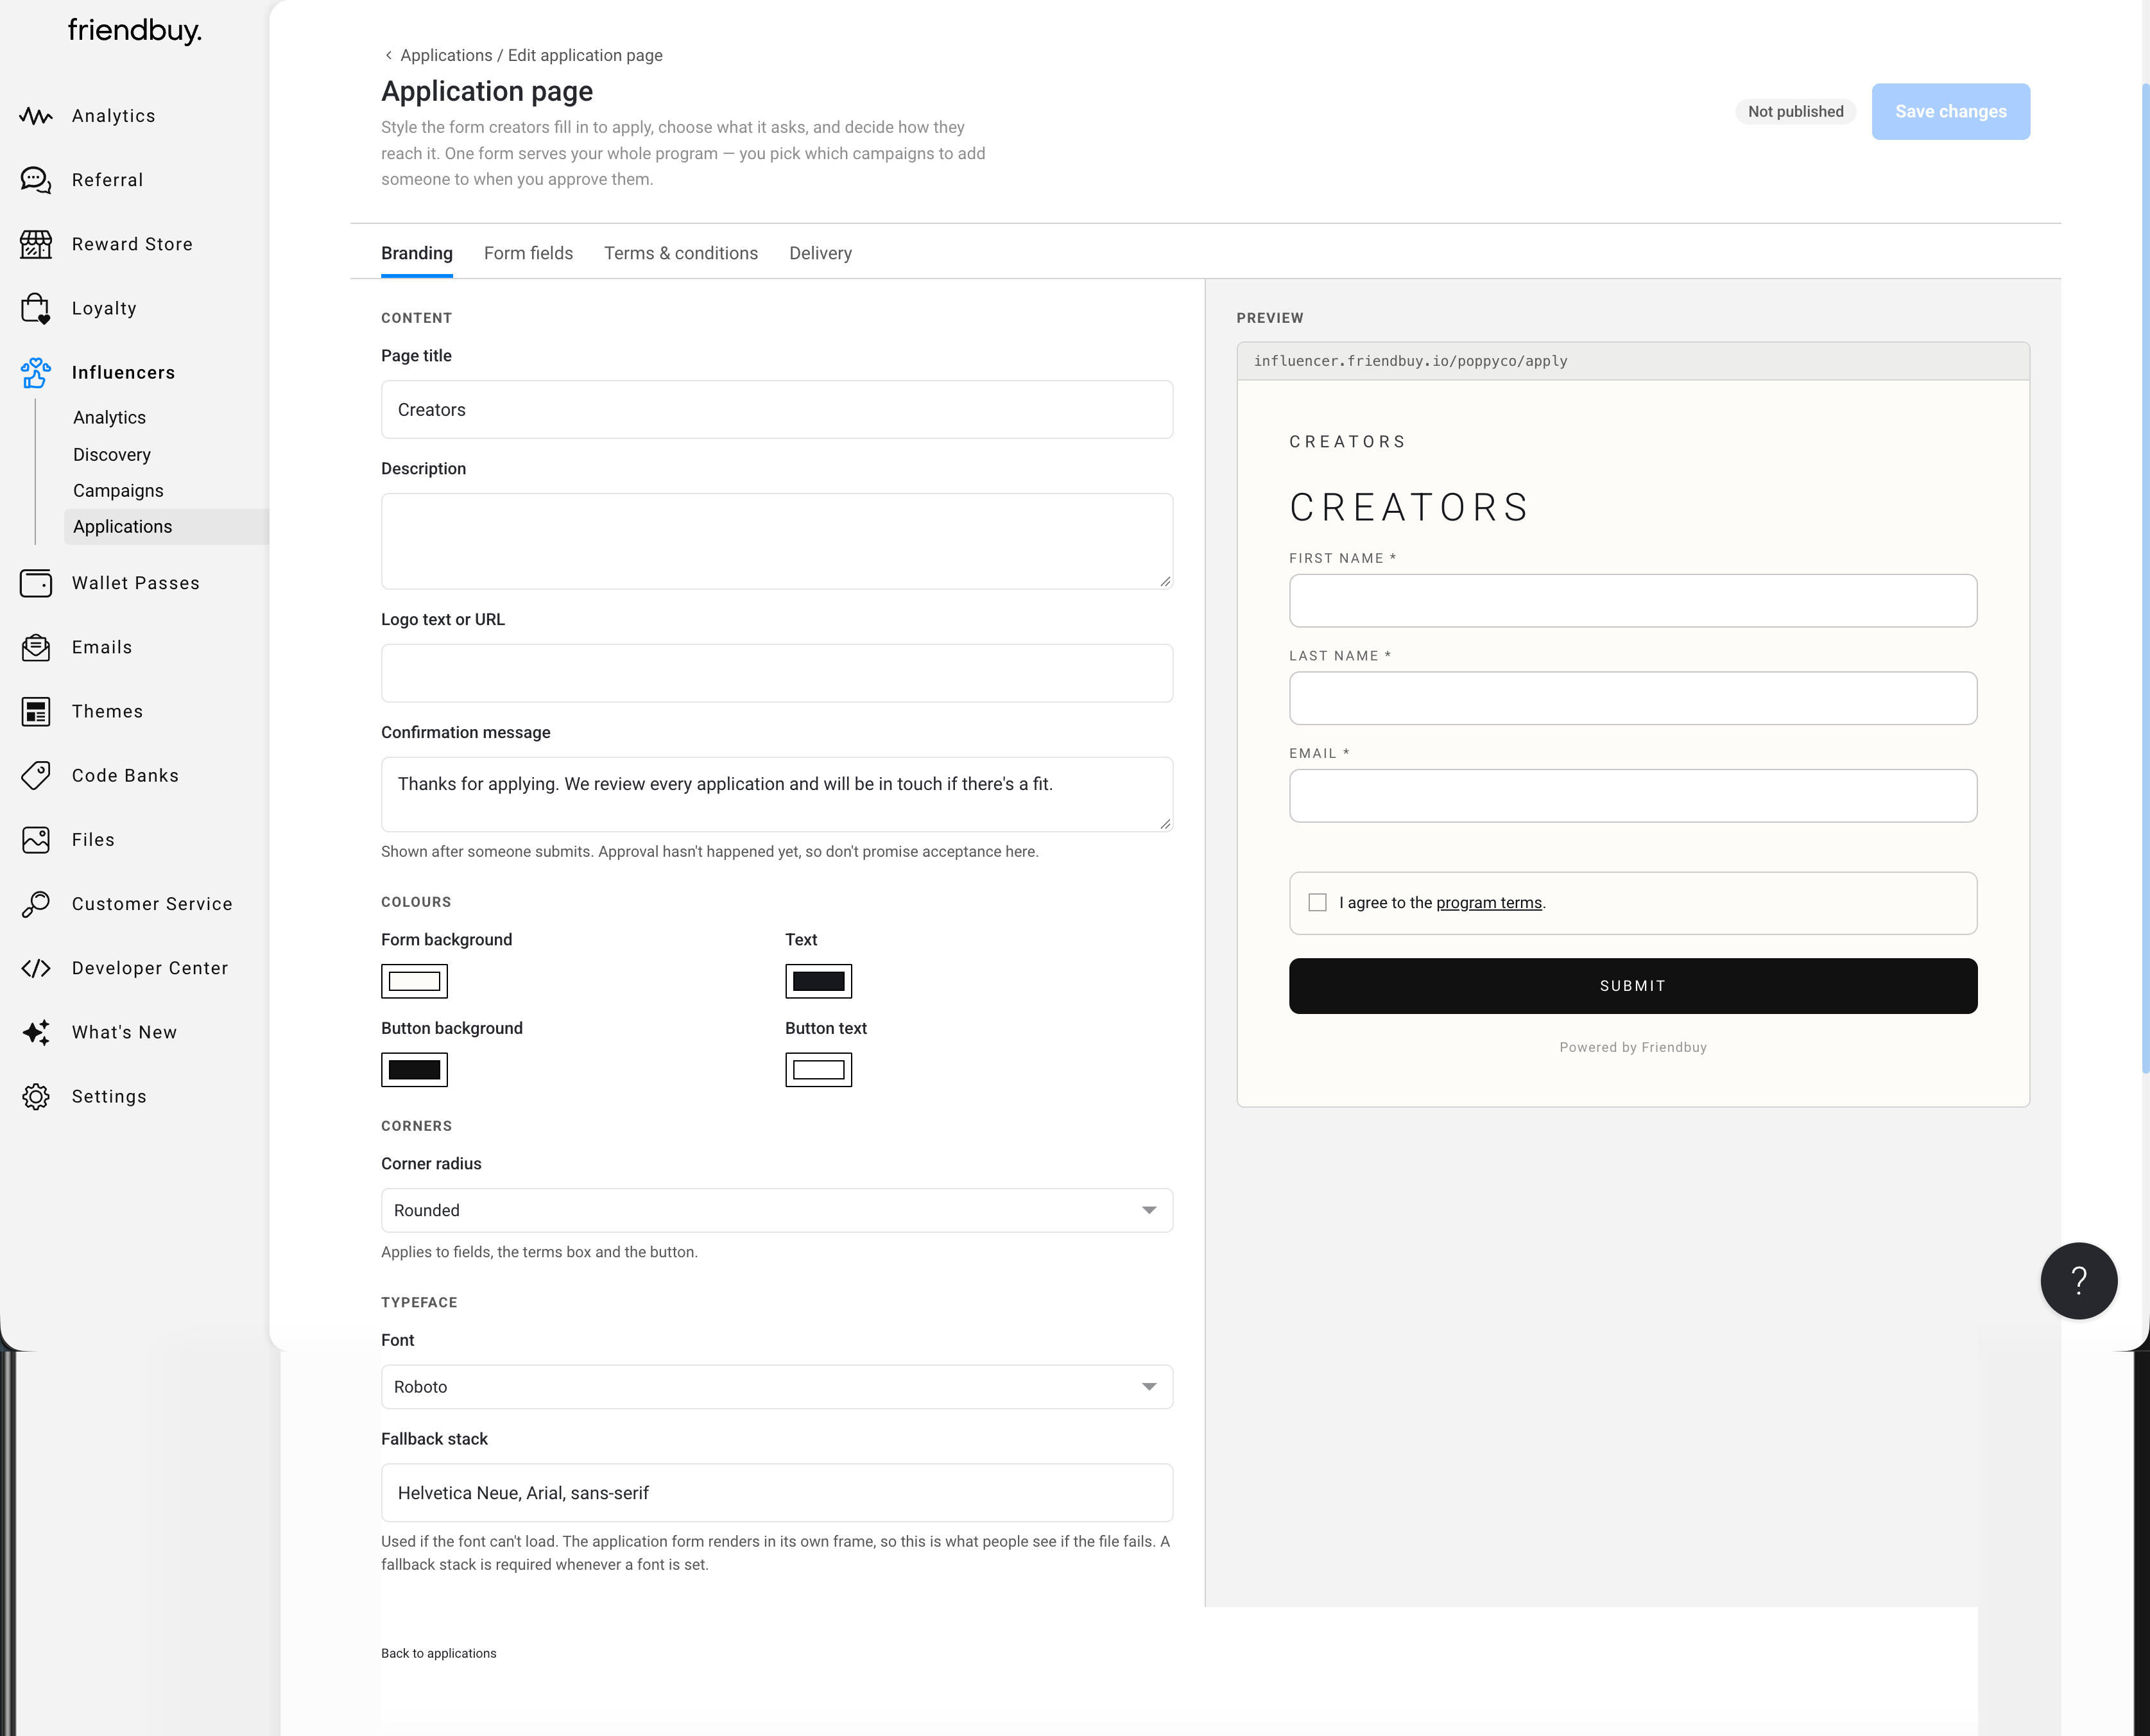
Go to Influencers > Applications and click Edit application page. The editor has four tabs: Branding, Form fields, Terms & conditions, and Delivery. A live preview on the right shows your form as creators will see it, at your page's web address.
Click Save changes in the top right when you're done. Your page shows Not published until you turn on a delivery option (see Publish and share below).
Branding
Match the form to your brand so it feels like part of your site.
Setting | What it does |
|---|---|
Page title | The heading at the top of the form, such as "Creators" |
Description | A short intro under the title. Tell creators what the program offers and who you're looking for |
Logo text or URL | Your logo image URL, or text to display in its place |
Confirmation message | Shown right after someone submits. Since you haven't reviewed them yet, avoid promising acceptance here |
Colours | Form background, text, button background, and button text |
Corner radius | Rounded or square corners on the fields, the terms box, and the button |
Font | The typeface for the form |
Fallback stack | The fonts used if your chosen font can't load, such as Helvetica Neue, Arial, sans-serif. Required whenever you set a font |
"Thanks for applying. We review every application and will be in touch if there's a fit."
Form fields
Every form asks for First name, Last name, and Email. You can change how these labels read, but you can't remove them, because they become the creator's record when you approve them.
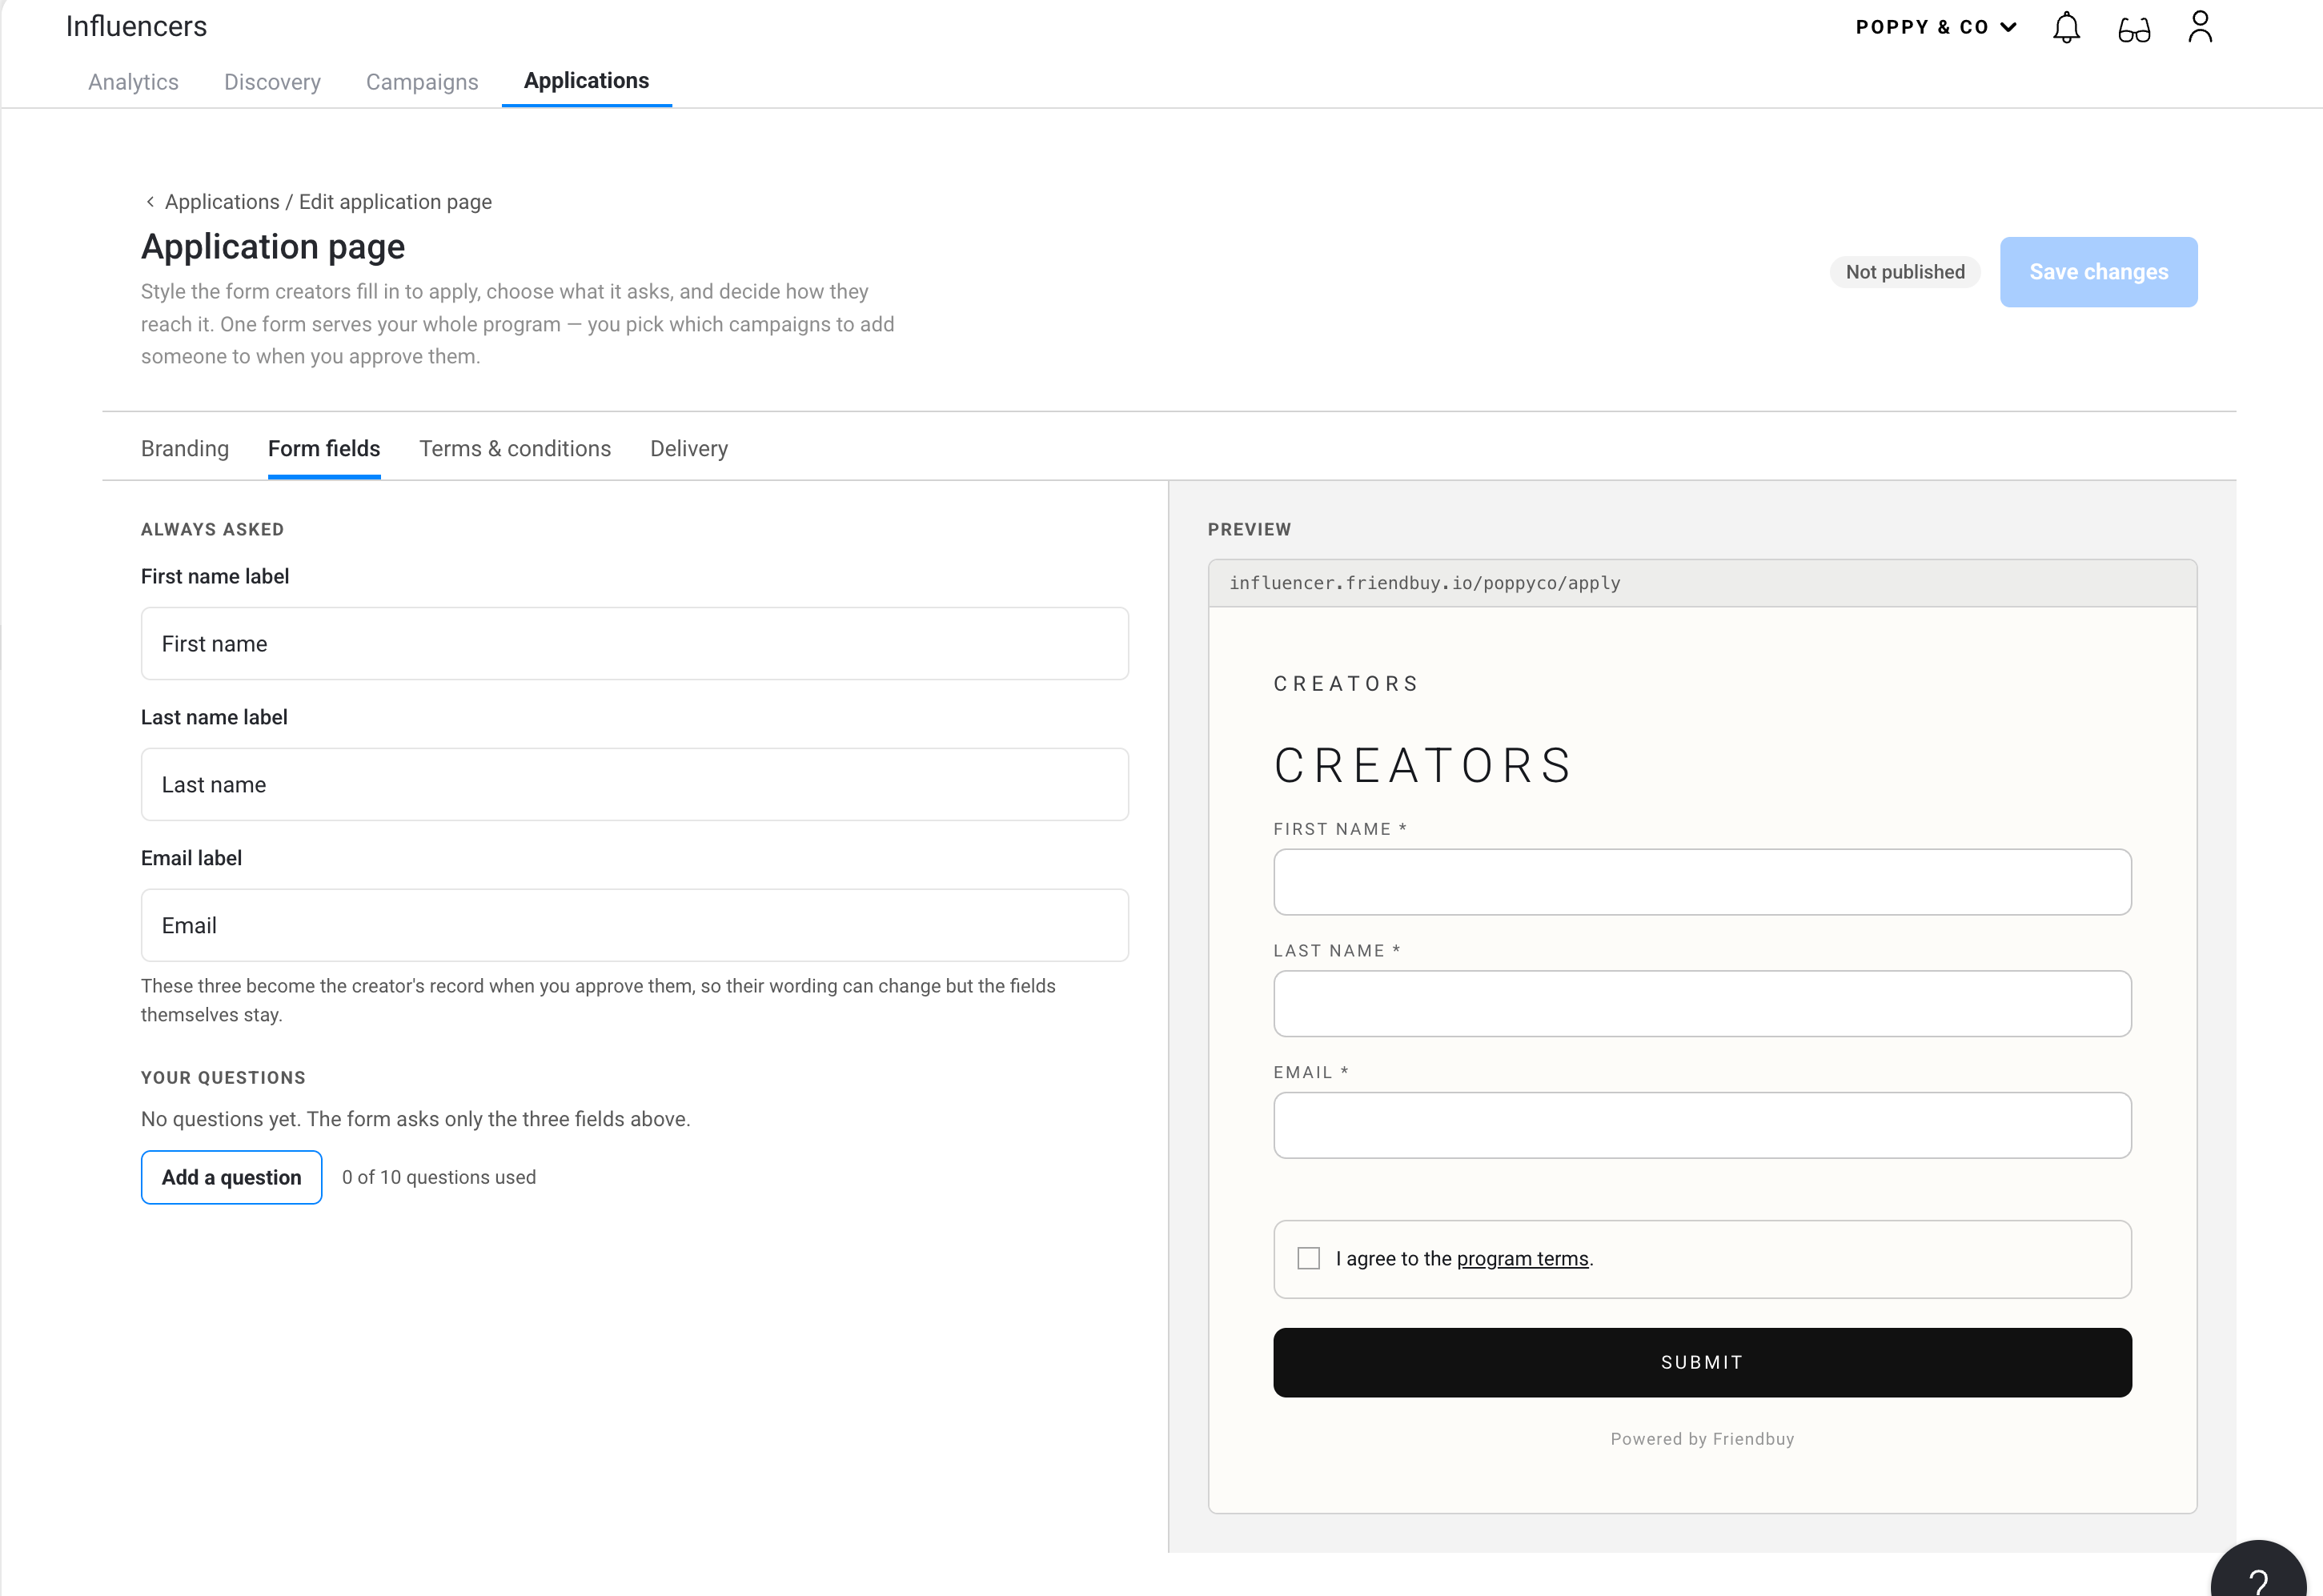
Under Your questions, click Add a question to ask for anything else you need to vet a creator, such as their social handles, audience size, or why they love your brand. You can add up to 10 questions.
Terms & conditions
Every applicant must accept your program terms before they can submit.
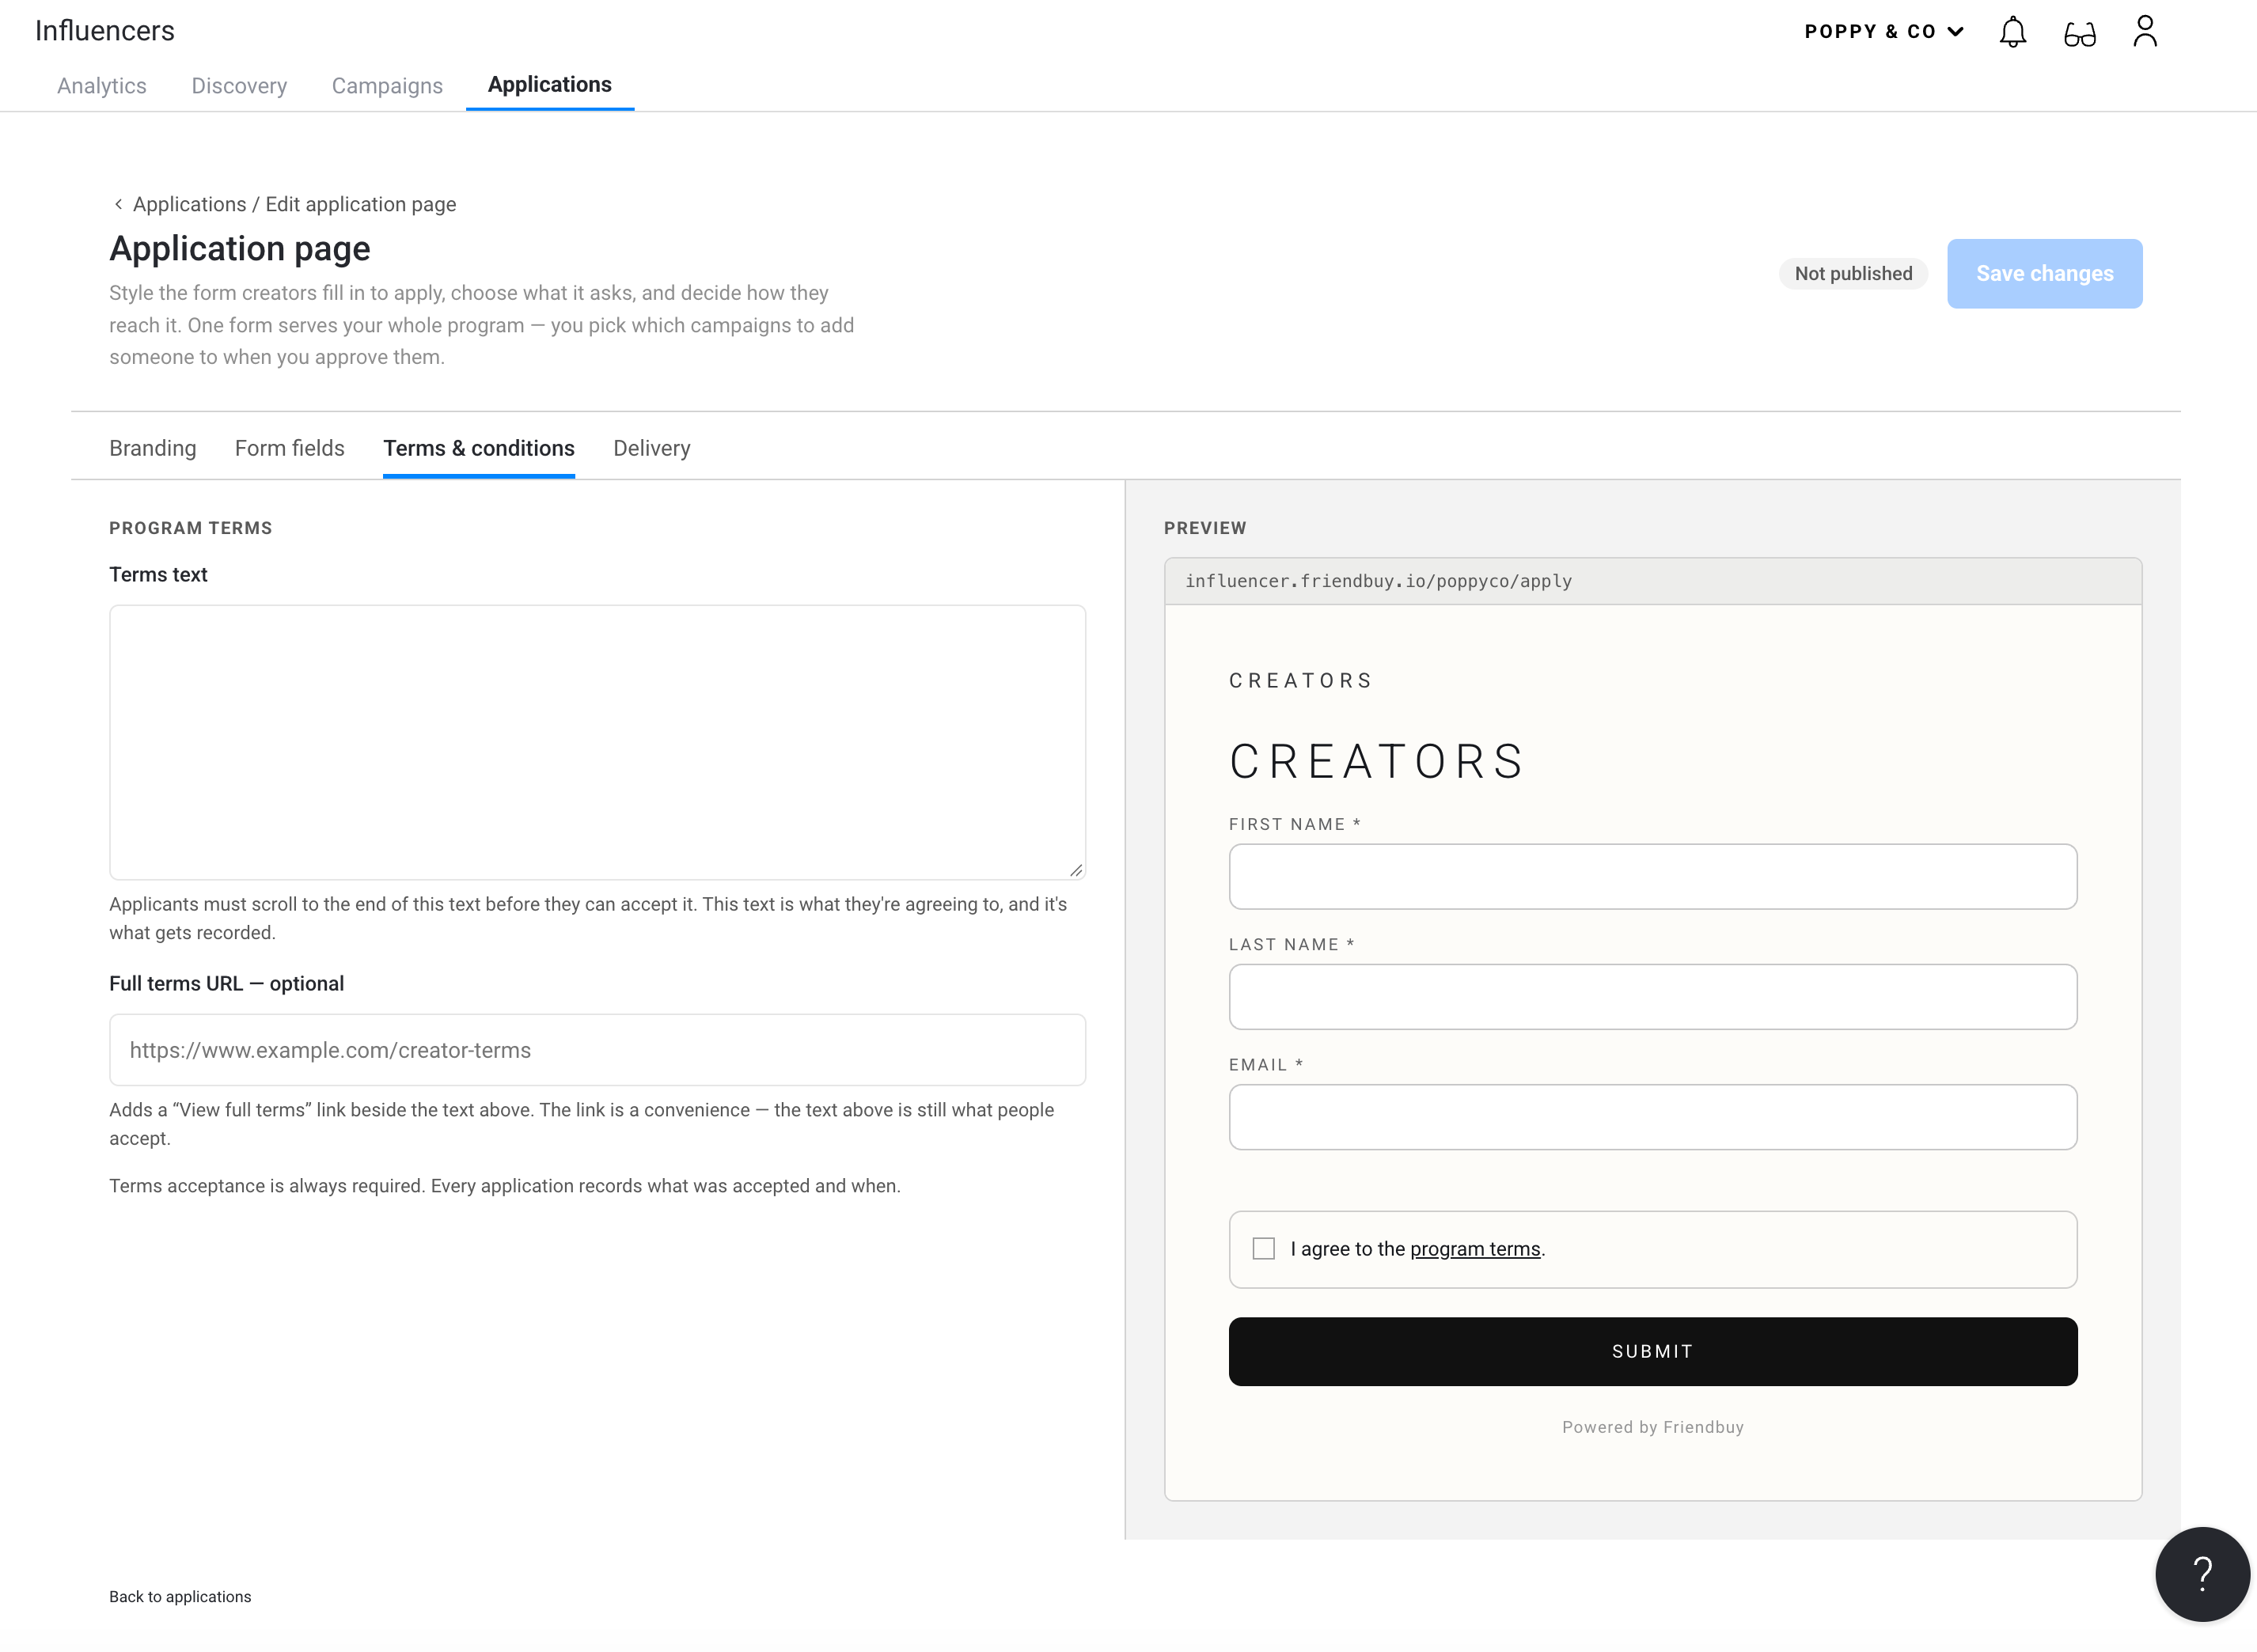
- Paste your program terms into Terms text. This is exactly what applicants agree to, and it's what gets recorded. Applicants have to scroll to the end of the text before they can check the box.
- Optional: add a Full terms URL if you host a longer version on your site. This adds a "View full terms" link next to the text. The link is a convenience only; the text in the box is still what people accept.
Each application records which terms were accepted and when, so you have a clear record if questions come up later.
Publish and share your form
On the Delivery tab, choose how creators reach your form. You can use a hosted page, an embedded form on your own site, or both.
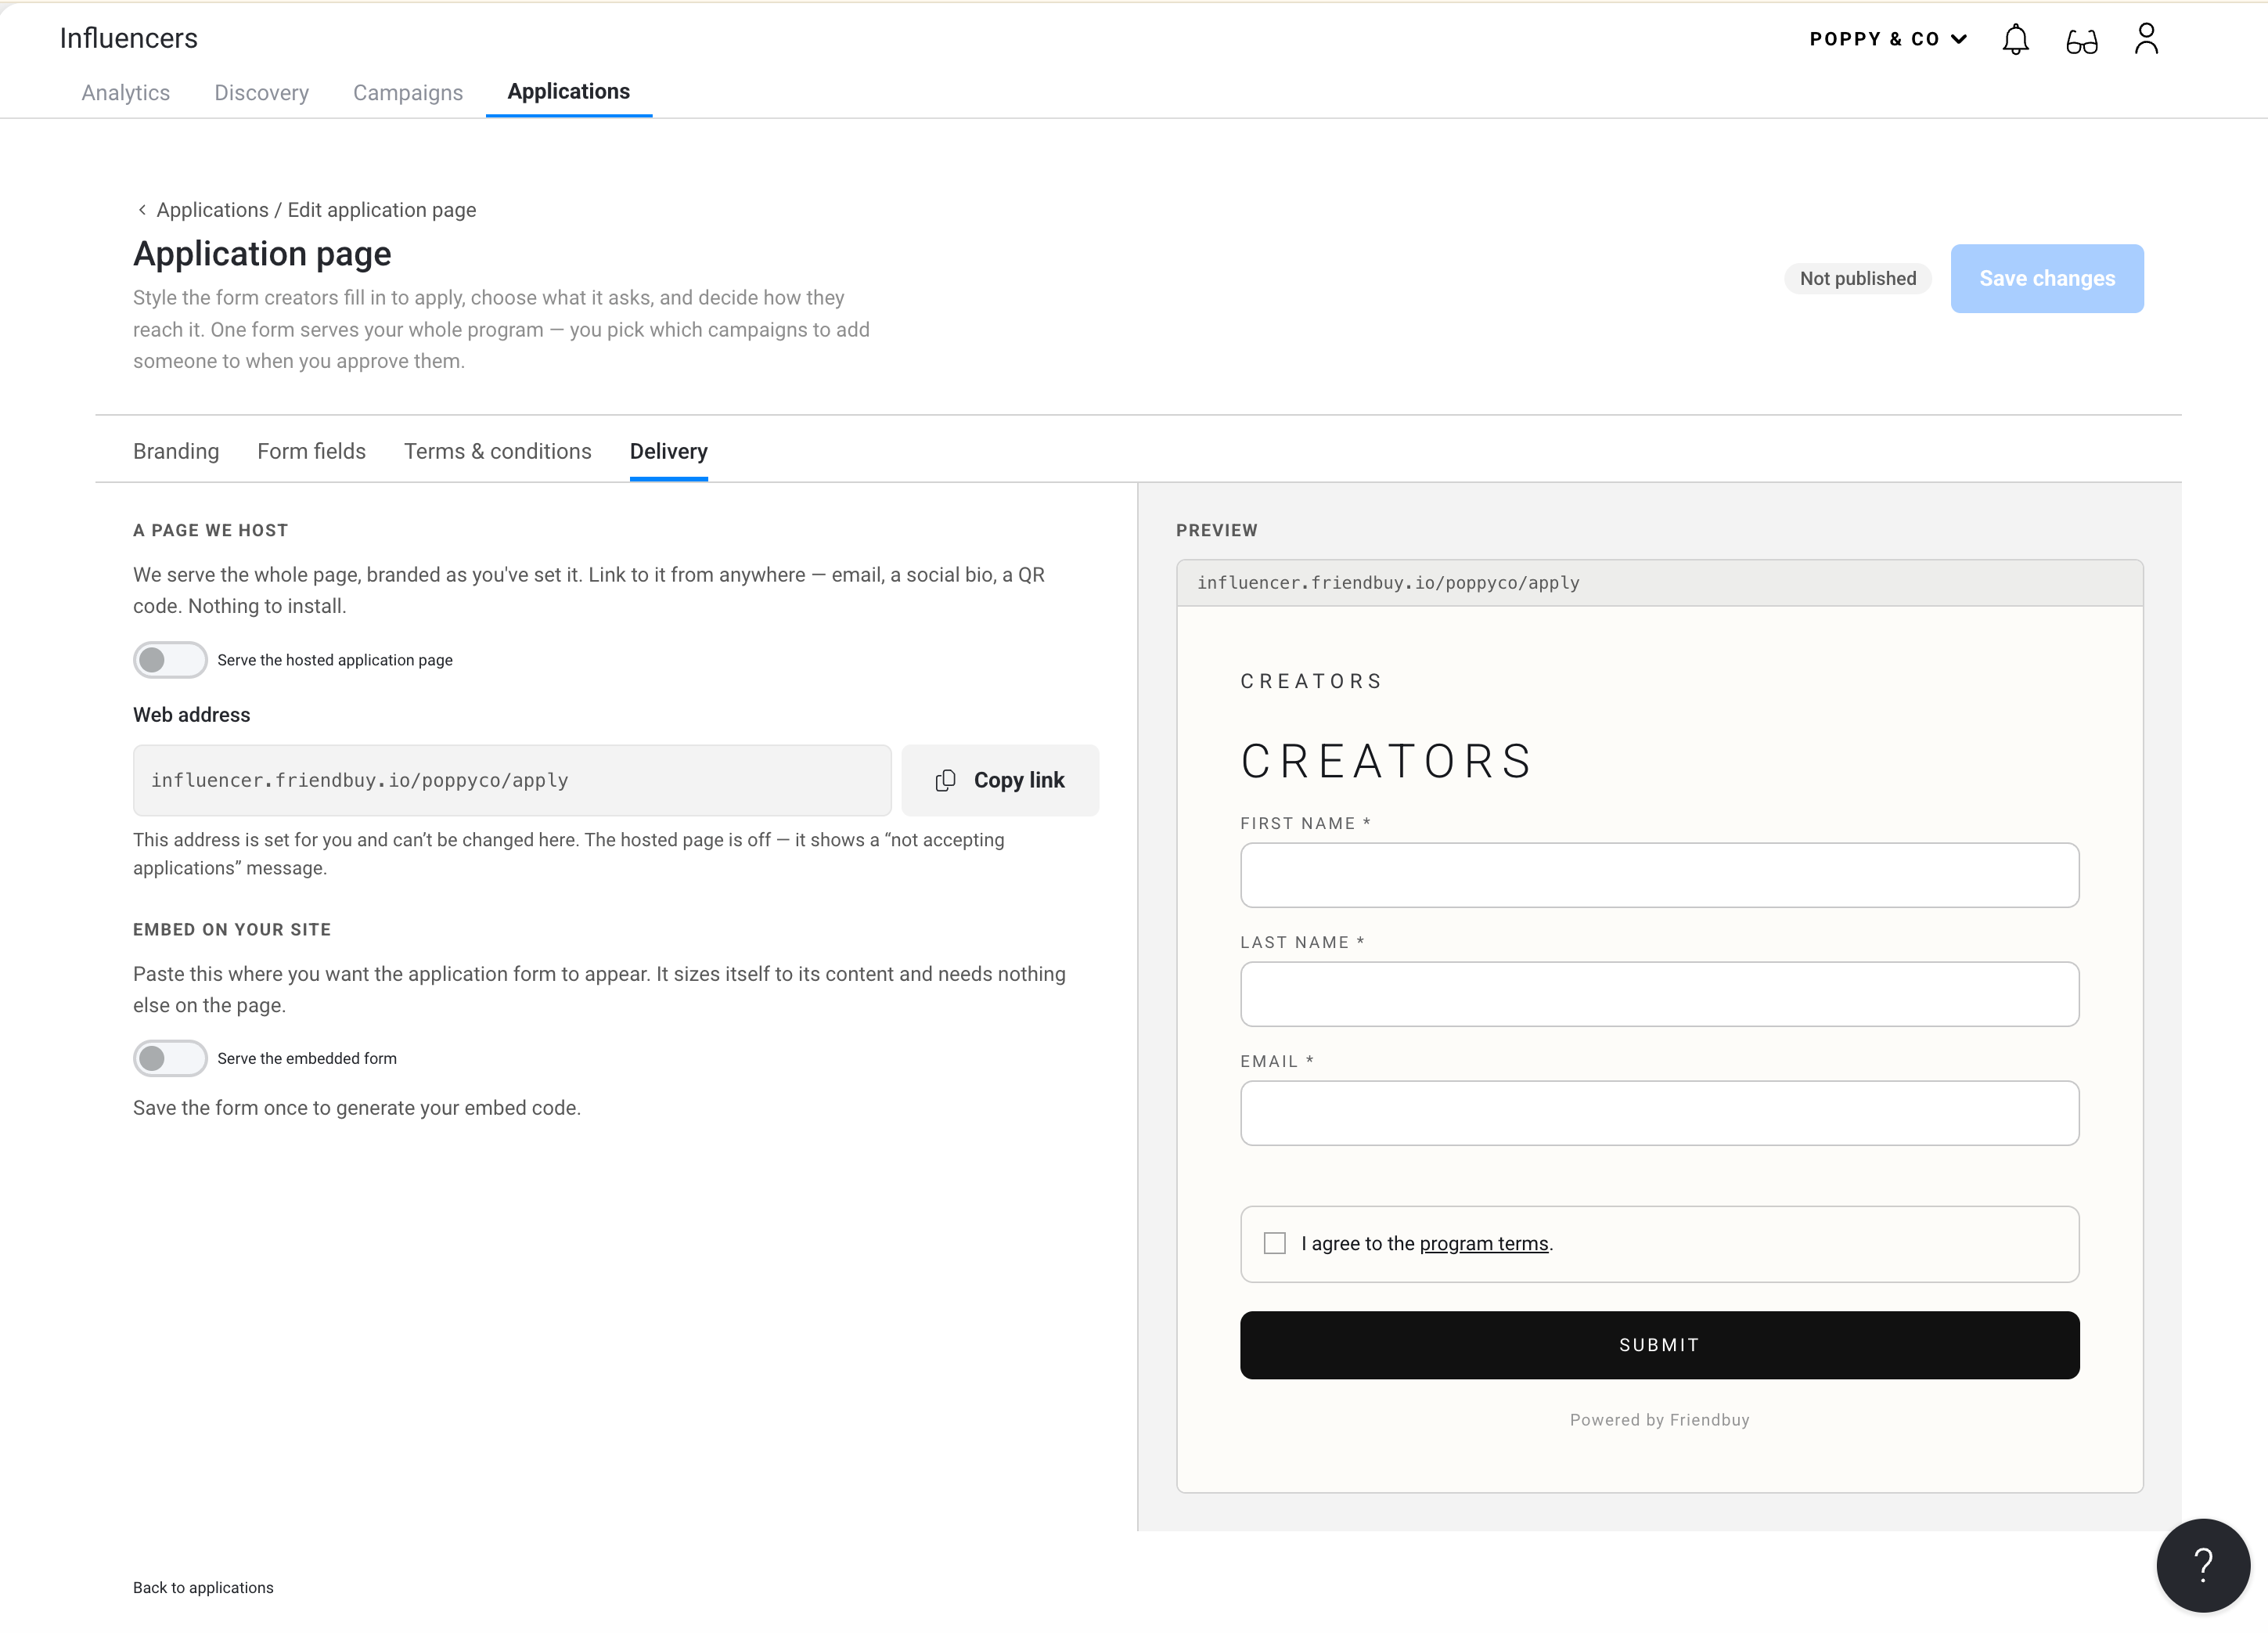
Friendbuy Hosted Page
Friendbuy serves the full page, branded the way you set it up. There's nothing to install.
- Turn on Serve the hosted application page.
- Click Copy link to copy your web address, which looks like influencer.friendbuy.io/yourbrand/apply.
- Share the link anywhere creators will see it: your site footer, emails, social bios, or a QR code at events.
Your web address is set for you and can't be changed. If you turn the hosted page off, anyone who visits the link sees a message that you're not accepting applications.
Embed on your site
Put the form directly on a page you already own, such as a "Become a creator" page.
- Save the form at least once. This generates your embed code.
- Turn on Serve the embedded form.
- Copy the embed code and paste it where you want the form to appear.
The embedded form resizes itself to fit its content and doesn't need anything else on the page. It loads in its own frame, which is why the fallback font stack on the Branding tab matters.
Review applications
New applications land in Influencers > Applications under Needs review. Each tab shows a count so you can see your queue at a glance.
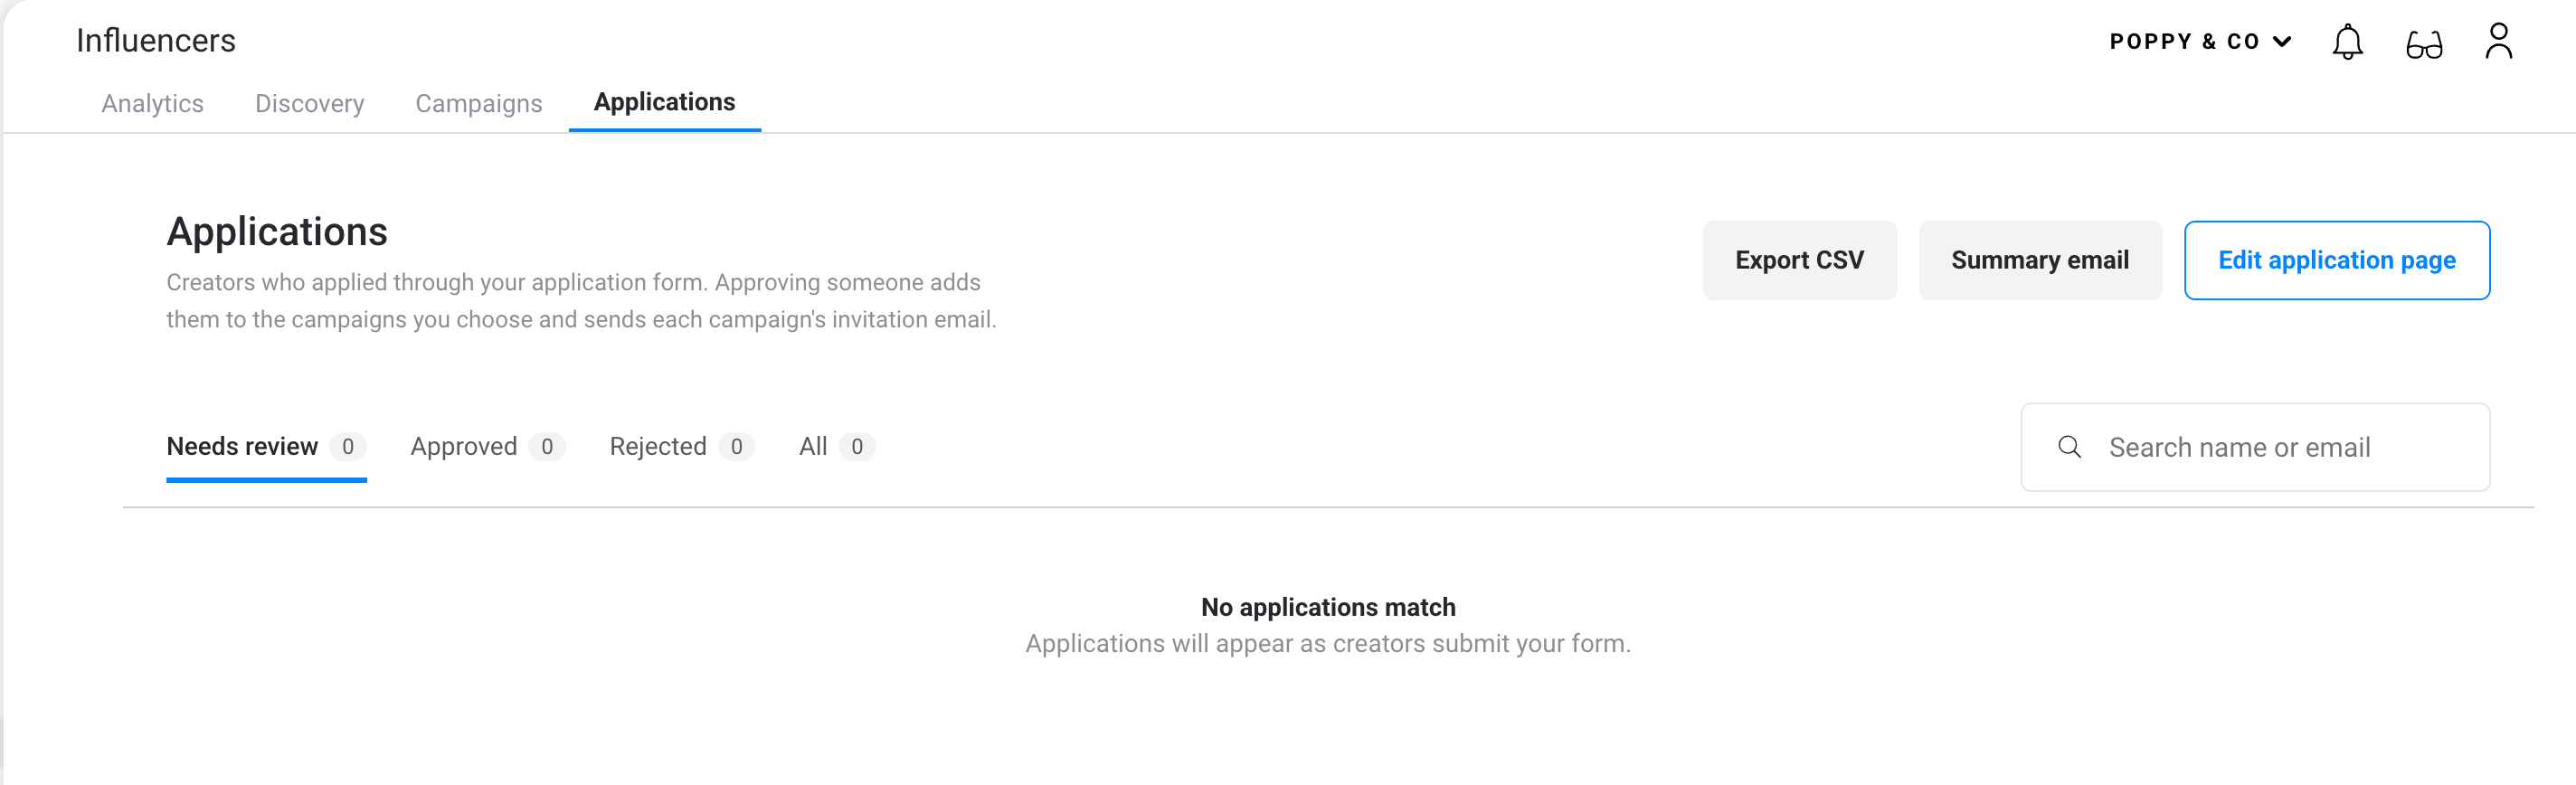
Tab | What's in it |
|---|---|
Needs review | New applications waiting for a decision |
Approved | Creators you've approved and added to campaigns |
Rejected | Applications you've turned down |
All | Every application, whatever its status |
Use the search box to find an applicant by name or email.
Approve a creator
- Open the application from Needs review.
- Review their details, answers to your questions, and accepted terms.
- Click approve and choose the campaigns to add them to.
The creator is added to each campaign you selected, and Friendbuy sends each campaign's invitation email. Make sure those campaigns' invitation emails are set up before you approve anyone.
Reject an application
Open the application and click reject. It moves to the Rejected tab, so you keep a record of everyone who applied.
Export applications
Click Export CSV to download your applications, for example to share with your team or bring into another tool.
Get a daily summary email
The daily summary is a short email sent at 9:00 AM Eastern on days when creators are waiting to hear from you. On days with nothing to review, no email goes out.
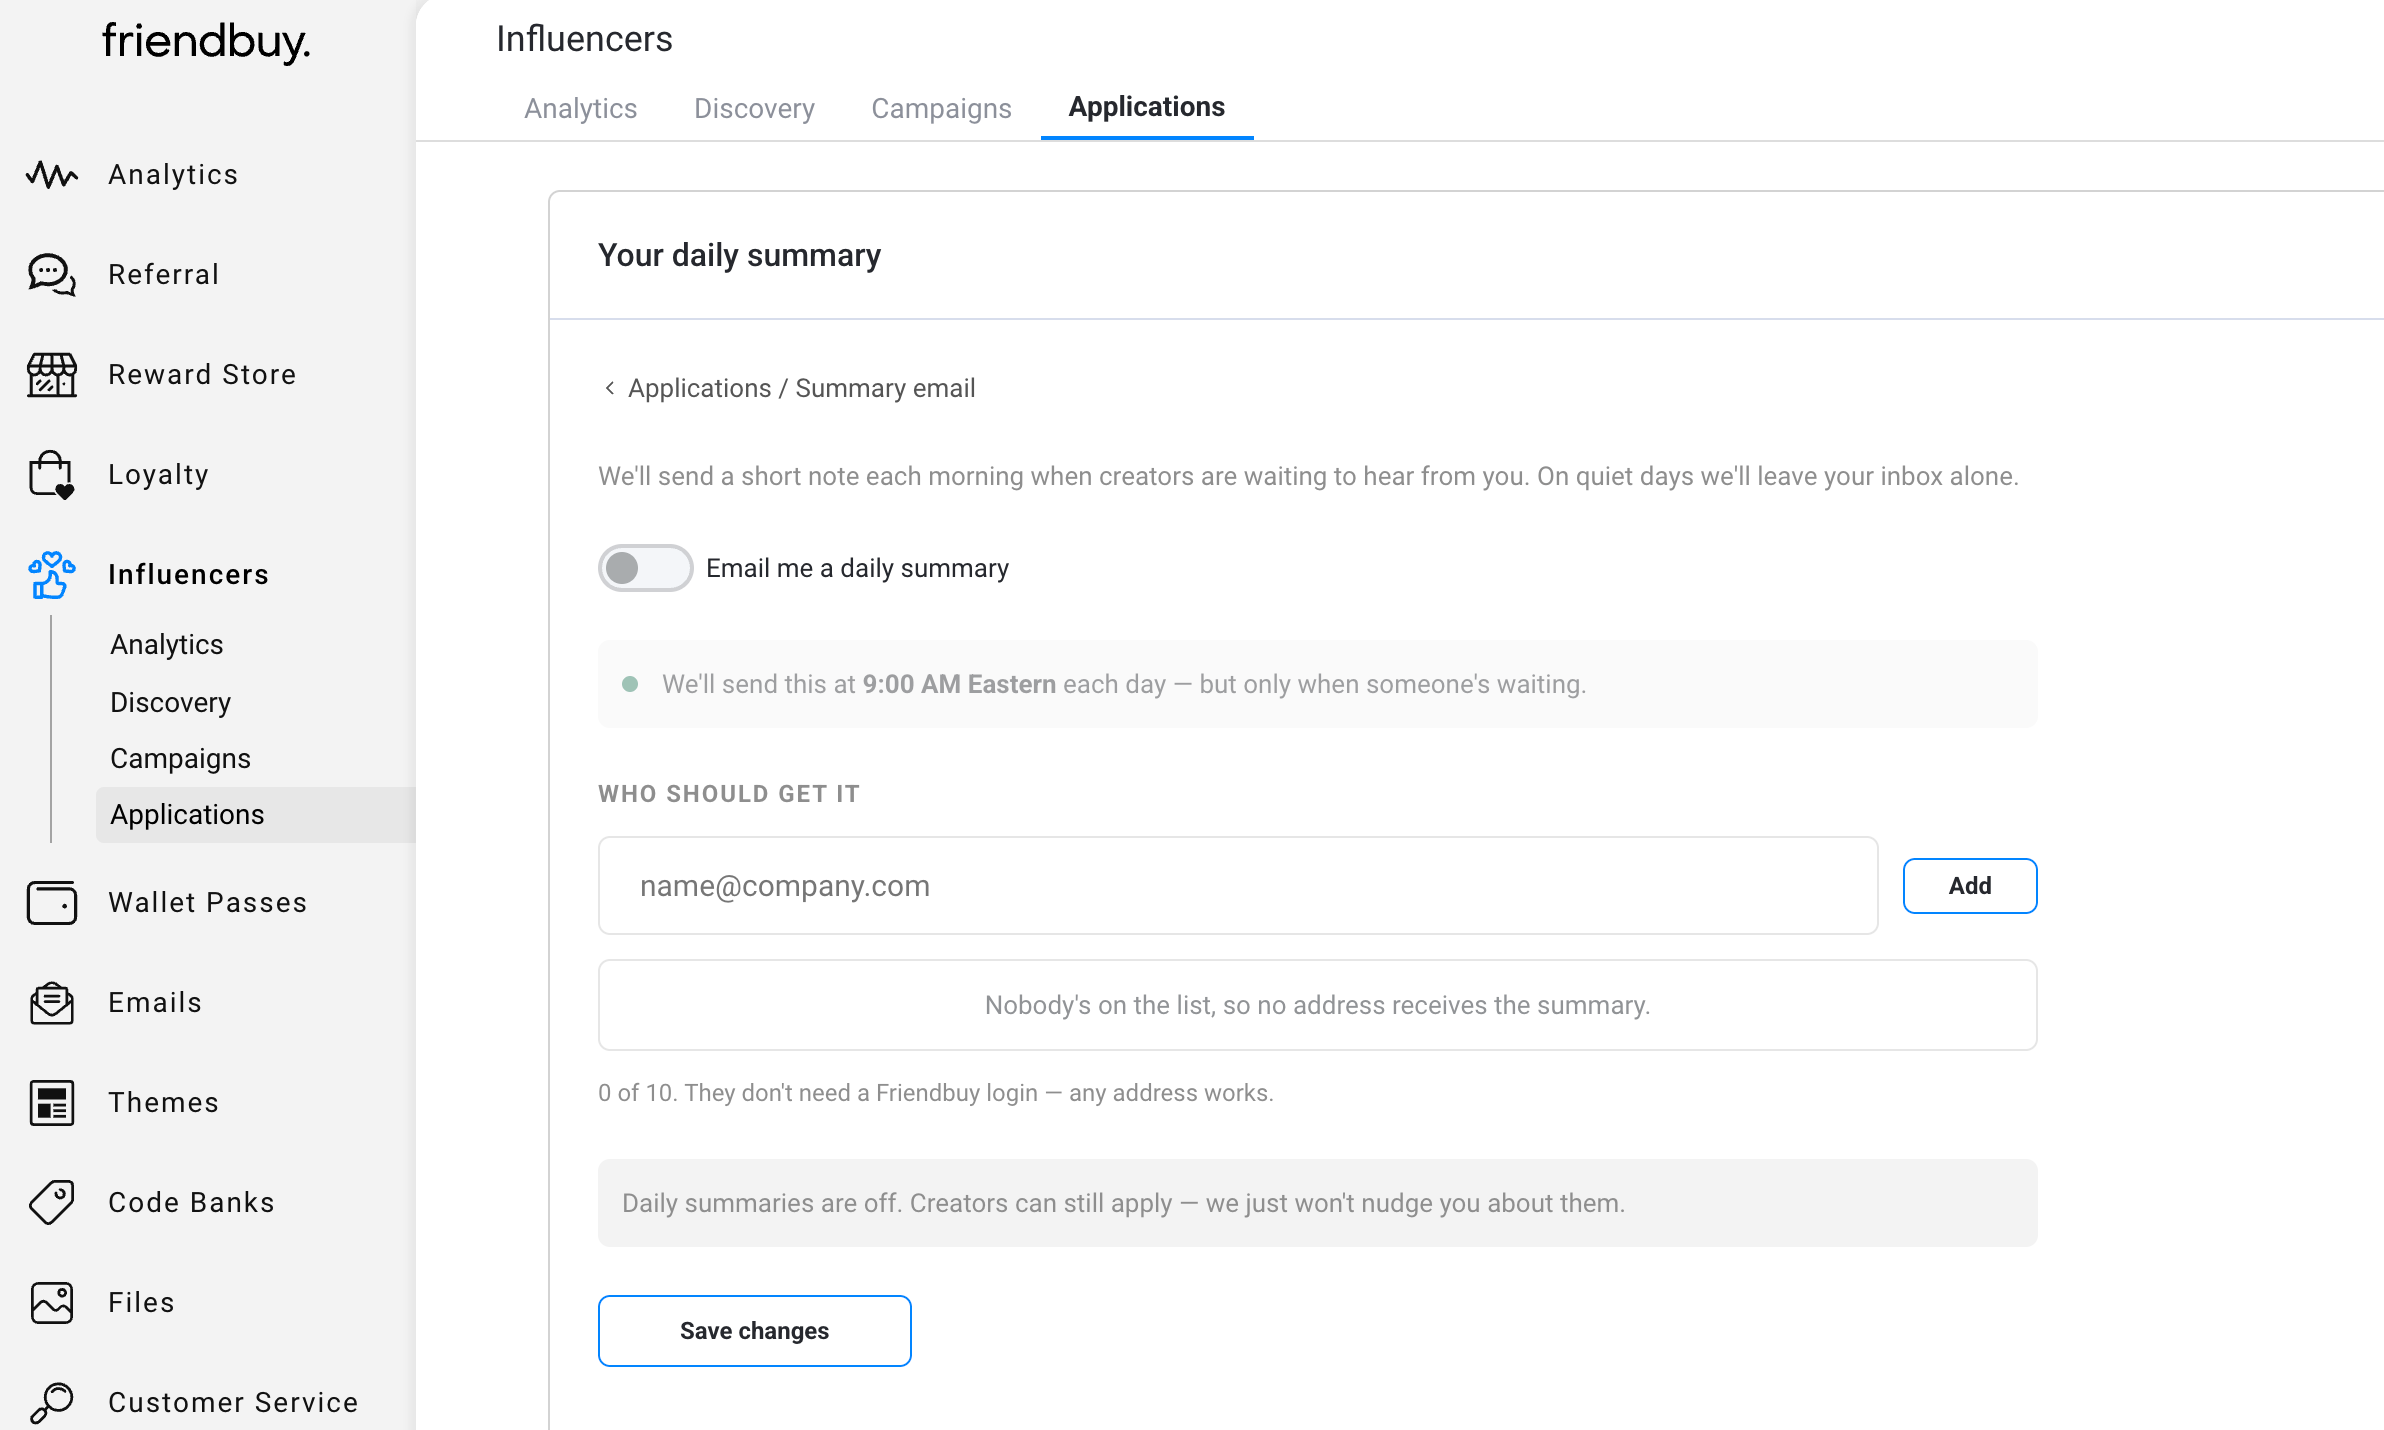
- On the Applications page, click Summary email.
- Turn on Email me a daily summary.
- Enter an email address and click Add. Repeat for up to 10 people.
- Click Save changes.
Recipients don't need a Friendbuy login, so you can include an agency partner or a teammate who handles creator relationships.
If you turn summaries off, creators can still apply. You just won't get a reminder about them.
Track results in Influencer Analytics
Go to Influencers > Analytics and scroll to the Applications section to see how your form is performing. Use the date range and campaign filters at the top of the page to narrow the view.
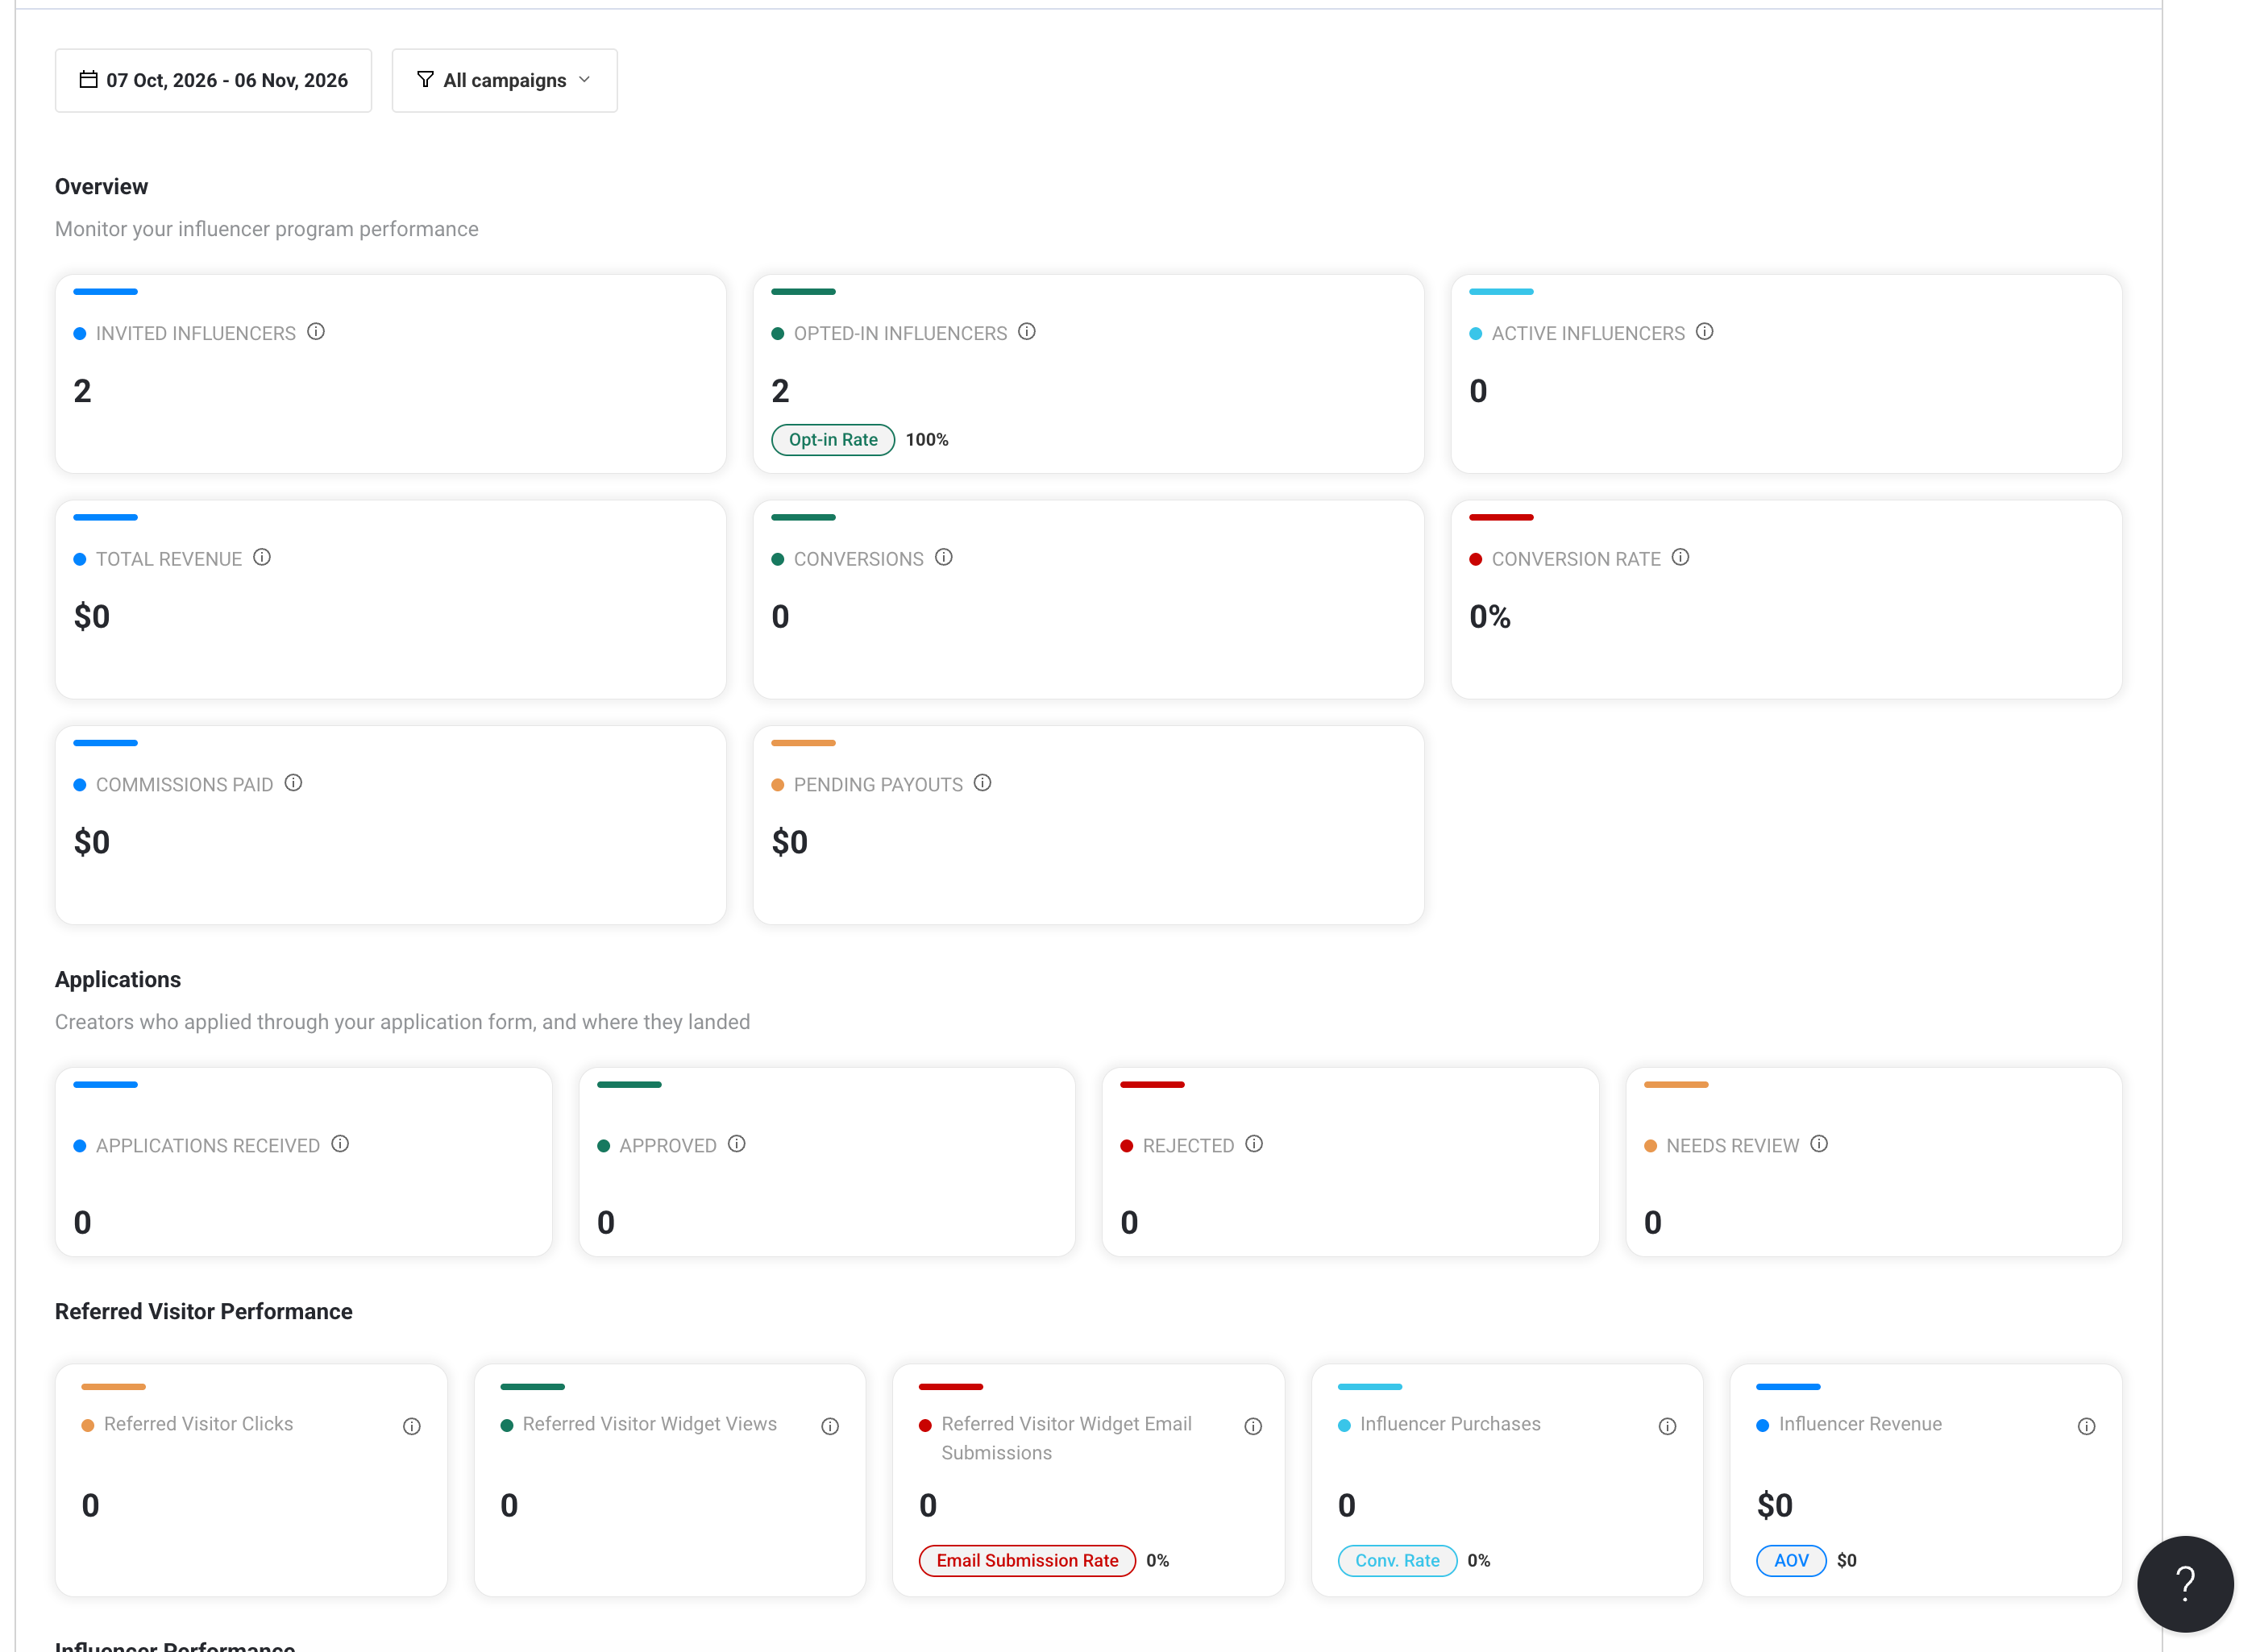
Metric | What it counts |
|---|---|
Applications received | Every application submitted through your form |
Approved | Applications you approved |
Rejected | Applications you turned down |
Needs review | Applications still waiting for a decision |
Once approved creators start sharing, their clicks, purchases, and revenue show up in the rest of the Influencer Analytics dashboard alongside creators you invited directly.
FAQ
Can I have a different form for each campaign? No. One form serves your whole program. You choose which campaigns to add a creator to when you approve them.
My page says "Not published." What do I do? On the Delivery tab, turn on the hosted page, the embedded form, or both, then click Save changes.
Why don't I see my embed code? Save the form once. The embed code is generated after the first save.
Can I change my application page's web address? No. The address is set for your account. If you want the form on your own domain, use the embedded form.
Can I remove the name or email fields? No. First name, last name, and email are required because they become the creator's record. You can change how the labels read.
Do creators have to accept terms? Yes. Terms acceptance is always required, and each application records the terms text that was accepted and when.
Why didn't I get a summary email today? Summaries only go out on days when applications are waiting for review. Also check that the toggle is on and your address is on the recipient list.
Do approved creators get an email? Yes. Approving someone sends the invitation email for each campaign you add them to.
Still stuck? Contact your Friendbuy Customer Success Manager or click the ? button in your Friendbuy dashboard.